
Fundamentals of Application Channels
Application channels are useful for establishing a communication channel in Front with a variety of third party data sources, from SMS to video calls to live chat. Application channels also allow you to publish your integration publicly to all Front customers, although this is optional (Front customers can also build application channels purely for in-house use). This guide will walk through all the necessary steps to build an application channel.
Replies to channel messages must use the same channel.You cannot receive an inbound message through a channel, and then reply to the message via another Front inbox such as your personal email account or a team inbox. If you would like to receive a message via a non-native channel and then reply to the message via another Front inbox, use the Import Message API endpoint instead.
Postman collection
We recommend using our Postman collection for Application Channels to facilitate your development.
Creating an Application Channel
To create an application channel, simply create an app in Front and add an app channel as a feature. Then, note the credentials (App UID and App secret) in the Settings tab.
Channel ID
When Front sends the initial authorization request for your channel, it also includes a channel_id property. This value is different from the Front ID and secret credentials supplied for your channel. You need the channel_id to make calls to the Channel API, which allows you to sync inbound and outbound messages from the channel into Front.
Refer to our Getting Started with Application Channels sample code for an example of retrieving the channel ID.
Composer Types for Application Channels
When you’re entering the information to create your own application channel, you’ll have the option to choose the type of composer. The two options provided are Basic and Advanced.
With a Basic composer, you’ll have the ability to compose and send only plain text content along with emojis and attachments while still retaining the ability to receive rich text messages.

With an Advanced composer, you’ll have the ability to compose and send a richer message. The following features are supported (along with their respective keyboard shortcuts).
- Bolding
- Italics
- Linking
- Strikethroughs
- Lists (numbered / bulleted)
- Block quotes
- Emojis
- Attachments

If you're using an application channel with an advanced composer and access messages sent through that channel via the API, please use the "body" field of the message to fetch the message content with all its data and formatting preserved.
Timeline Types for Application Channels
When creating an application channel, you can specify the type of conversation timeline for your channel within the Timeline UI Type setting. The options include:
- Standard Timeline
- Chat Timeline
Standard timeline
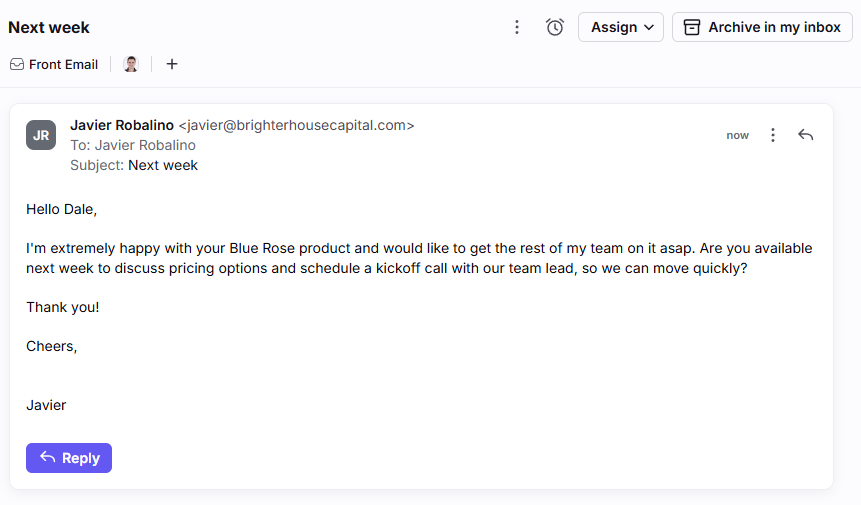
The standard Front timeline is designed for email and most other application channels. Messages are displayed in large message boxes, and the composer is initialized when you click on the “Reply” or “Reply all” buttons.
Chat timeline
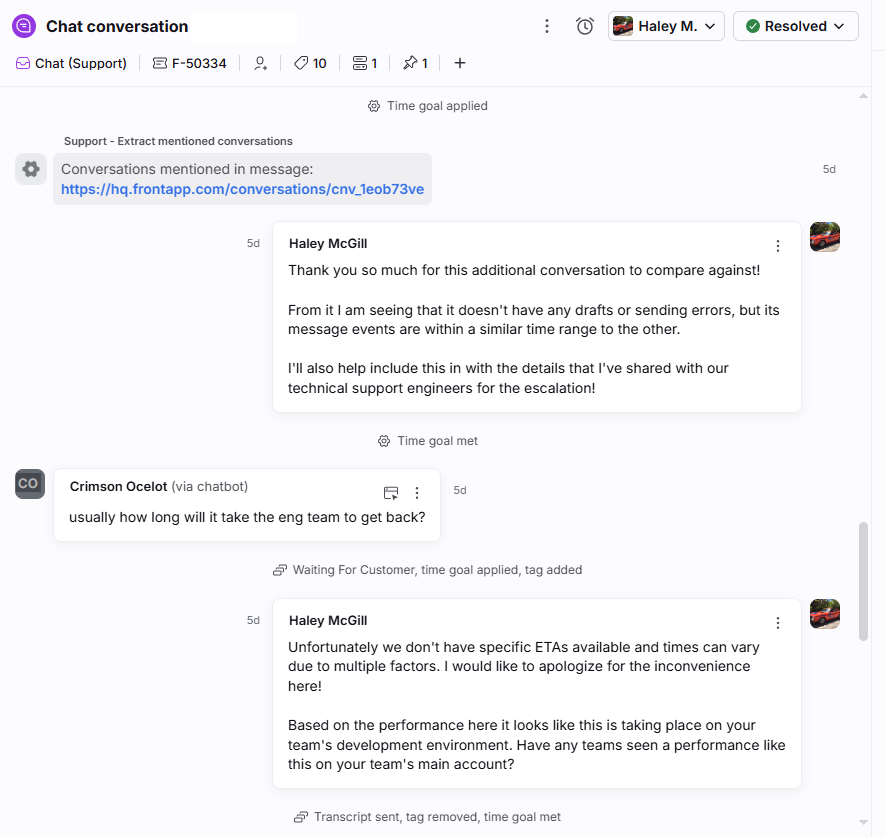
The chat timeline option is optimized for real-time communication like live chat or SMS. Messages are displayed in message bubbles and the composer is open by default at the bottom of the timeline to make it easy to respond quickly to customers.

Channel Authorization
Now that you have an application channel set up, you’ll need to build support for a few key functions. The first is channel authorization, which occurs when a Front user attempts to connect an instance of your channel from their Front settings.
If you set your authentication method to “API Token”, users will see the following when they attempt to connect your channel. If you haven’t already, you’ll need to set up some kind of mechanism to allow users to create an API token for your service. Note that the API Key that users are expected to submit here is not the same as the secret key you obtain from the Settings tab of your app. The API key discussed in this section is expected to be something that your users can get directly from you, and will allow you to identify which user is trying to connect the channel to Front.

If you set your authentication method to “OAuth”, users will see the following when they attempt to connect your channel. The blue button will redirect the user to the OAuth URL you provided in the channel application. We’ll use the OAuth Client Secret and OAuth Refresh Url to retrieve an access token.

At this point, whether your channel is using API token or OAuth authentication, Front will have an access token it can use to make requests to your server.
Best practice: When implementing OAuth for application channels, leverage token instrospection URLsAfter obtaining an access token for an application channel, you can allow the external service to provide a custom channel name and address (for private credentials) or a resource owner ID and name (for shared credentials) during the OAuth flow by using the token instrospection for channel identification.
Making a request for authorization
With credentials for the external service in hand, we then make an authorization request to your server. This request differs depending on whether you configured your channel with private or shared credentials.
Requesting authorization for private credentials
For private credentials, you do not need to take explicit steps here. Front will use the Bearer token to POST to the Webhook URL you supplied in the channel settings. The body of the request will look like:
{
  "type": "authorization",
  "payload": {
    "channel_id": "cha_123"
  }
}
Your system will need to respond to this message and other messages from Front within 7 seconds, as detailed in the Responding to Authentication section. After 7 seconds, Front will timeout and return an error to the user, regardless of any response received after the 7 second timeout.
Requesting authorization for shared credentials
For shared credentials, you will need to supply Front with the list of channel addresses available to the resource owner. Front will use the Bearer token to POST to the Webhook URL you supplied in the channel settings. The body of the request will look like:
{
  "type": "list_addresses",
  "payload": {
    "page_token": "<page_token>"
  }
}
Your system will need to respond to this message and other messages from Front within 7 seconds. After 7 seconds, Front will timeout and return an error to the user, regardless of any response received after the 7 second timeout.
The response should supply an array of channel addresses (unique channel identifiers) and user-facing names that are available for authorization. If you paginate this list, as the user selecting channels scrolls down in Front, you will receive subsequent list_addresses events requesting the next page of results. If you do not paginate, you can omit the pagination object.
{
  "type": "success"
  "addresses":
  [
    {
      "address": "<channel_address>",
      "name": "<channel_name>"
     },
     ...
  ],
  "pagination": {
    // Send if there are multiple pages of results
    "next_page_token": "<page_token>"
  }
}
After the user in Front selects the channels they want to authorize, Front will send your webhook URL a POST authorization event for each of the channel addresses selected.
{
  "type": "authorization",
  "payload": {
    "channel_id": "cha_123",
    "address": "<one_of_the_channel_address_selected>"
  }
}
Your system will need to respond to each authorization event from Front within 7 seconds, as detailed in the Responding to Authentication section. After 7 seconds, Front will timeout and return an error to the user, regardless of any response received after the 7 second timeout.
Responding to Authentication
Once you’ve verified that the request is valid, your server should store the channel_id in the authorization payload and associate it with the owner of the token. This will allow you to send and receive messages in the future. You’ll also need to send a 200 response to the authorization request with the following:
{
  "type": "success",
  "webhook_url": "https://webhook.company.com/..."
}
The webhook URL you provide here will be used by Front to POST new messages sent from Front using the channel instance the user created. It does not necessarily have to be a unique webhook for each channel instance.
Root domain of your webhook URL must match one of your app's servers
Note that the root domain of thewebhook_urlyou provide does not have to match that of the server configured for this application channel, but it does have to match one of the servers configured in your app.
You can test that your server is properly handling channel creation by using the “Authorization” endpoint under “Your Webhook Endpoints” in the Postman collection for Application Channels.
Sending and Receiving Messages
Managing threading
Threading defines how individual messages will be “threaded” into a single conversation. Some channels thread simply by the sender of a message, while others thread conversations only within a particular time frame, or use some other custom logic. With the Channel API, you can control threading through the external_conversation_ids, which must be set when sending messages into the channel. Messages with the same external_conversation_ids will be threaded together. Note that this value is different from a message’s external_id, which is simply a unique identifier of a single message.
Replying to specific messages
You can reply to a specific message by including the referenced_message_external_id field in the metadata object. This value should be set to ID of the message being referenced as a direct reply.
If the message in your external channel (in this case, WhatsApp), replies to a specific message:
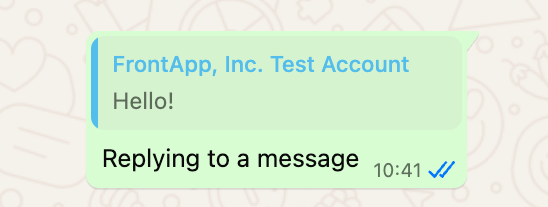
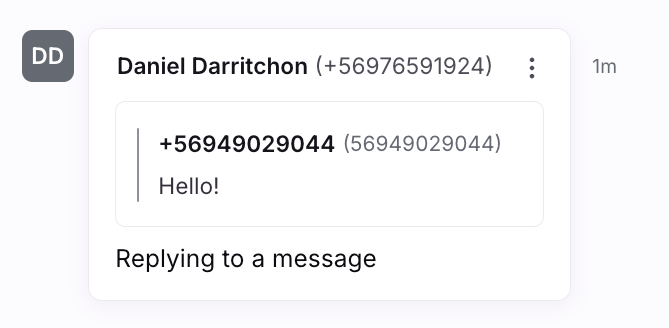
Then using the referenced_message_external_id will make it so the new message references a previous one in Front:
Authenticating requests to Front
When sending API requests to Front (as described in the next section), they must be authenticated by setting a bearer authorization token generated using your application secret key, application UID, and the channel ID you are trying to send to.
These authorization tokens must be generated as JSON web tokens (JWTs), and must contain specific claims:
| Claim | Example | Description |
|---|---|---|
iss | 64711a73def367ca | Issuer identifier. This must be set to your Front application App UID. This is found on the Settings tab of your app. |
jti | 801f4e544049244b | JWT ID. Can be any string, but should be unique per token. |
sub | cha_123 | Subject of the token. This must be the channel ID the API request is being issued for. |
exp | 1694761200 | Expiration time of the token as a unix timestamp. Must expire no more than 30 seconds after the API request is sent. |
Sample code for generating these tokens can be found in the pre-request script of the Postman collection for Application Channels, or via this link. Note that you can use that bearer token to make requests to any of the Channel API endpoints as well as Core API routes of the following formats:
/conversations/:conversation_id*/messages/:message_id*
Creating messages in Front
There are two endpoints that can be used to create a message in Front for your channel — the
Sync inbound message endpoint and the Sync outbound message endpoint. The sync inbound message endpoint should be used when you are trying to send an inbound message to the channel. For example, a lead that has just written a message into a website live chat widget. The sync outbound message endpoint should be used to import a message that was sent from the channel. This is useful if outbounds might be sent by the channel outside the context of Front — for example, importing a message that a bot replied to the lead, so that users in Front can see the full history of the conversation.
In either case, you will need to authenticate requests to Front by setting an authorization bearer token. See the steps in the section above for details on how to generate these API tokens.
A successful request to the Sync inbound message or Sync outbound message endpoints will result in a response that includes a message_uid you can use to fetch the full message and conversation created in Front. To do so, use the Get message endpoint and use the uid as a resource alias . For example, https://api2.frontapp.com/messages/alt:uid:abcd1234. Directly fetching the message this way is not necessary though, because Front will also send message_imported payload to the channel-instance-specific webhook URL to let you know about the successful import.
{
	"type": "message_imported",
  "payload": {
    [MESSAGE BODY]
  },
  "metadata": {
    // A single Front conversation may have multiple external conversation
    // ids because conversations in Front can be merged.
    "external_conversation_ids": [string]
  }
}
You can test that your server is properly sending messages to Front by using the “Inbound Message” and “Outbound Message” endpoints in the Postman collection for Application Channels.
Receiving messages from Front
There are two ways your channel might receive messages from Front:
- Messages sent manually by a user
- Auto-reply messages
1) Manually-sent messages
When a user in Front sends a new outbound message or replies to an inbound message using your channel, Front will POST the following to the channel-instance-specific webhook URL:
{
  "type": "message",
  "payload": {
    [MESSAGE BODY]
  },
  "metadata": {
      "external_conversation_ids": string[], // External identifier of the conversations related to this message.
      "referenced_message_external_id": string // (Optional) ID of the message being referenced as a direct reply
  }
}
The payload will match the Message schema, an example of which is provided below:
{
  "_links": {
    "self": "https://api2.frontapp.com/messages/msg_55c8c149",
    "related": {
      "conversation": "https://api2.frontapp.com/conversations/cnv_55c8c149",
      "message_replied_to": "https://api2.frontapp.com/messages/msg_1ab23cd4"
    }
  },
  "id": "msg_55c8c149",
  "type": "email",
  "is_inbound": true,
  "draft_mode": null,
  "created_at": 1453770984.123,
  "blurb": "Anything less than immortality is a...",
  "author": {
    "_links": {
      "self": "https://api2.frontapp.com/teammates/tea_55c8c149",
      "related": {
        "inboxes": "https://api2.frontapp.com/teammates/tea_55c8c149/inboxes",
        "conversations": "https://api2.frontapp.com/teammates/tea_55c8c149/conversations"
      }
    },
    "id": "tea_55c8c149",
    "email": "[email protected]",
    "username": "leela",
    "first_name": "Leela",
    "last_name": "Turanga",
    "is_admin": true,
    "is_available": true,
    "is_blocked": false
  },
  "recipients": [
    {
      "_links": {
        "related": {
          "contact": "https://api2.frontapp.com/contacts/crd_55c8c149"
        }
      },
      "handle": "[email protected]",
      "role": "to"
    }
  ],
  "body": "Anything less than immortality is a complete waste of time.",
  "text": "Anything less than immortality is a complete waste of time.",
  "attachments": [
    {
      "filename": "attachment.jpg",
      "url": "https://api2.frontapp.com/download/fil_55c8c149",
      "content_type": "image/jpeg",
      "size": 10000,
      "metadata": {
        "is_inline": true,
        "cid": "123456789"
      }
    }
  ],
  "metadata": {}
}
Be sure to check that the type of payload is message, create the message in your system, and respond with an external_id and external_conversation_id that you want to associate the message with:
{
  "type": "success",
  "external_id": "external_message_{{$randomInt}}",
  "external_conversation_id": "external_conversation_1"
}
2. Auto-reply messages
Front allows users to create auto-reply rules, which automatically send a response upon receiving an inbound message.
Auto-reply messages differ from manually-sent messages in certain ways, related to data structure and the sequence of events:
- An auto-reply message has not yet actually been sent by the time Front sends the event to your channel. This means that an auto-reply event has a different payload than a
messageevent. An example auto-reply event is shown below. - After your channel responds with the external IDs, your channel will receive a
message_importedevent with the full message, as described above.
When an auto-reply message is sent, your channel should take the following steps:
- Expect a request like the following. (Note the different payload when compared to a manually-sent message payload.)
- Create the message in your system
- Respond with the same information as with the
messageevents; this will be used to associate the message with a conversation. As withmessageevents, bothexternal_idandexternal_conversation_idare required). - Wait for a
message_importedevent from Front, which will include the full message payload.
{
  "type": "message_autoreply",
  "payload": {
    [AUTOREPLY MESSAGE BODY]
  }
}
This time, the request type is message_autoreply, and the payload will have a different structure. Here's an example payload:
{
  "_links": {
    "related": {
      "conversation": "https://api2.frontapp.com/conversations/cnv_55c8c149",
      "message_replied_to": "https://api2.frontapp.com/messages/msg_1ab23cd4"
    }
  },
  "type": "auto_reply",
  "is_inbound": false,
  "created_at": 1453770984.123,
  "body": "I'll get back to you as soon as possible.",
  "text": "I'll get back to you as soon as possible.",
  "recipients": [
    {
      "_links": {
        "related": {
          "contact": "https://api2.frontapp.com/contacts/crd_55c8c149"
        }
      },
      "handle": "[email protected]",
      "role": "to"
    }
  ],
  "attachments": [
    {
      "filename": "attachment.jpg",
      "url": "https://api2.frontapp.com/download/fil_55c8c149",
      "content_type": "image/jpeg",
      "size": 10000,
      "metadata": {
        "is_inline": true,
        "cid": "123456789"
      }
    }
  ]
}
Though the payload is different than the payload for a message event, the expected response is the same:
{
  "type": "success",
  "external_id": "external_message_{{$randomInt}}",
  "external_conversation_id": "external_conversation_1"
}
Handling errors
In some cases, there might be errors that happen on your channel when Front POSTs a message to the provided webhook. To help debug these issues, and to convey failures to users, you can include a certain error code and message in your response. If you wish to indicate that an error occurred while sending a message, you can respond in the following format.
{
  "type": [ERROR_CODE],
  "message": [MESSAGE]
}
If type is any of the following, it will indicate in the UI that the message failed to send.
bad_request
authentication_required
forbidden
not_found
request_timeout
too_many_requests
internal_error
Including the message property is optional. If you do include it, that string will be presented to users as the reason that the message failed to send, pictured below

Updating status through the API
Application channels can become unauthenticated with their third-party services. While typically Front will detect this automatically and set the channel to offline, in the case of low-volume channels this may not happen automatically. The application channel PATCH endpoint can be used to update the channel's status to offline manually, which will prompt users to re-authenticate immediately instead of waiting for drafts to fail to send.
This endpoint should be called by the channel itself using the channel's token in the same way as the sync inbound/outbound message endpoints are called.
When the channel is set to offline, users will see a popup in the lower-left corner of Front that looks something like this:

offline channel popup
When the 'View Settings' button is clicked, it will take the user into the channel settings where they can begin the process to re-authenticate the channel. That looks something like this:

Deletion (optional)
When a user deletes an instance of your channel, Front will send the following to your webhook URL:
{
  "type": "delete",
  "payload": {
    "channel_id": "cha_123"
  }
}
Handling this case is optional, but will allow you to keep up to date with user’s channel usage.
Security
To verify that this and other messages sent from Front for your channel are legitimate, you can validate the message signature before accepting it into your system.
The requests made to your webhook server will include 2 headers: X-Front-Signature and X-Front-Request-Timestamp. First, check that the timestamp says the request was made recently in order to prevent replay attacks. We recommend 5 minutes as the maximum time before rejecting a message.
- Retrieve the
X-Front-Request-Timestampheader on the HTTP request and the body of the request. - Concatenate the timestamp and the JSON stringified body of the request to form a string. Use a colon as the delimiter between the two elements.
GET and DELETE requests return a string with the value "undefined" as the body
- Using HMAC SHA256, hash the above string, using your App Channel Secret Key as the key.
This should match the X-Front-Signature header. If it does not, you should not trust this message. See the following TypeScript example.
/**
 * Validate that the request is from Front
 *
 * Concatenate the request body + timestamp, delimited with a colon.
 * Take SHA256 HMAC and validate it's equal to the X-Front-Signature
 * in the Request Header
 *
 * In production, we recommend loading the app channel secret from a configuration file.
 *
 * @param {Request} req: Incoming request from Front.
 * @param {string} appChannelSecret: Secret Key of your Application Channel. From the Settings tab of your App.
 * @returns {boolean} Boolean denoting whether or not request is from Front.
 */
function isRequestFromFront(req: Request, appChannelSecret: string): boolean {
  const timestamp = req.headers['x-front-request-timestamp'];
  const rawBody = JSON.stringify(req.body);
  // GET and DELETE requests send a string with the value "undefined" as the body
  const baseString = `${timestamp}:${rawBody}`;

  const hmac = crypto.createHmac('sha256', appChannelSecret)
    .update(baseString)
    .digest('base64');

  return hmac === req.headers['x-front-signature'];
}


/**
 * Creates a JSON web token
 *
 * jwt is your preferred JWT library found at https://jwt.io/
 * In production, we recommend loading Channel ID and secret from a configuration file.
 *
 * @param {string} appChannelId: The App UID of your App (in the Settings tab).
 * @param {string} appChannelSecret: Secret Key of your app channel. From the Settings tab of your App.
 * @param {number} channelId: The ID of your channel instance, returned when you authorize your channel.
 * @returns {string} Signed JSON web token
 */
function buildToken(appChannelId: string, appChannelSecret: string, channelId: number) {
  // Mark token to expire within 5 seconds for security (small usage window)
  const exp = Math.floor(new Date().valueOf() / 1000) + 5;

  // Can be any string, can be used by your system to identify tokens
  const jsonWebTokenId = 'abc123';

  const payload = {
    iss: appChannelId,
    jti: jsonWebTokenId,
    sub: channelId,
    exp
  };

  return jwt.sign(payload, appChannelSecret);
}
Enable @mention autocomplete
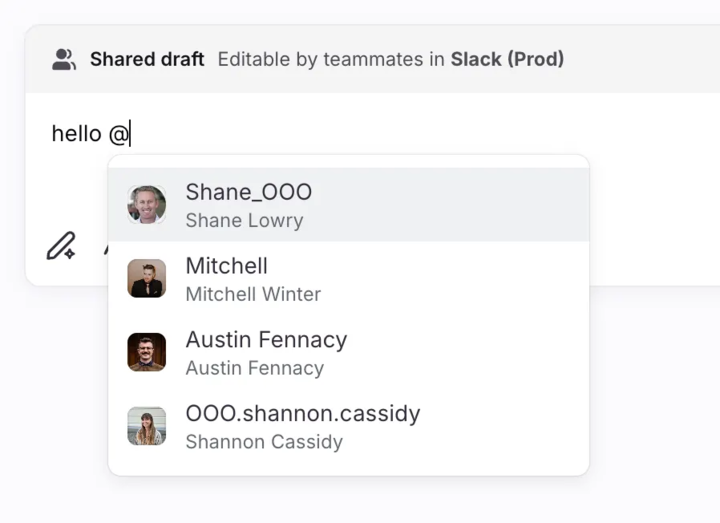
You can enable autocomplete @mention functionality in your channel, allowing users to tag channel contacts directly from the Front composer. When enabled, Front will request a list of mentionable users from your application whenever a user types @ in the composer. Your application returns a list of users that Front displays as autocomplete suggestions. When selected, Front inserts a link to the mentioned user in the message.
To enable this feature, make sure the @ Autocomplete mentions toggle is turned on when you create the application channel.
How autocomplete works
- Front teammate types
@in the Front composer. - Front sends a
mentions_fetchrequest to your channel's webhook URL. - Your application returns a list of mentionable users.
- Front displays this list as autocomplete suggestions.
- When a teammate selects a mention, Front inserts it as a link in the composer.
Request format
When a user types @ in the composer, Front sends the following payload to your channel's webhook URL:
{
  "type": "mentions_fetch",
  "payload": {
    "channel_id": "cha_123123",
    "filter": "sha"
  }
}channel_id(string)—the Front channel ID where the mention is being typedfilter(string | null)—the text the user has typed after@(e.g., typing@shasends"filter": "sha"). Use this to filter your results. Will benullif the user has only typed@with no additional characters.
Response format
Your application should respond with a list of mentionable users:
{
  "type": "success",
  "mentions": [
    {
      "label": "Shane_OOO",
      "description": "Shane Lowry",
      "avatar_url": "https://example.com/avatars/shane.jpg",
      "value": "https://slack.com/team/U09T6D16PJ5"
    },
    {
      "label": "mitchell.winter",
      "description": "Mitchell Winter",
      "avatar_url": "https://example.com/avatars/mitchell.jpg",
      "value": "mailto:[email protected]"
    }
  ]
}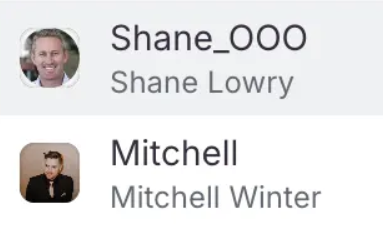
label(string, required)—the primary display text shown in the autocomplete dropdown (e.g., username or handle, "Shane_OOO" and "Mitchell" in the screenshot above)description(string, optional)—secondary text displayed below the label (e.g., full name, "Shane Lowry" and "Mitchell Winter" in the screenshot above)avatar_url(string, optional)—URL to the user's avatar imagevalue(string, required)—the href value used when the mention is inserted. This can be any valid URL format that you can then use to associate the user correctly on your end. For example:- Email links:
mailto:[email protected] - Profile links:
https://slack.com/team/U09T6D16PJ5 - Custom application links:
https://yourapp.com/users/123
- Email links:
Publishing
Refer to the Partnering With Front topic to learn how to publish your channel integration.
That’s it! If you have any questions, feel free to reach out to us on the Front Community.
Updated 4 months ago