Creating a Links partner integration
Links are similar to tags in Front except that they are designed to connect conversations to items in external systems, such as feature requests, bugs, loans, shipments, itineraries etc. If you’re not familiar with Links, please see the overview article.
This guide walks through how to build a Links integration that can be published to all Front customers and listed on the Front integrations directory. It is designed to help providers of project management, order management, CRM tools and more to integrate their services with Front. You can build integrations similar to the existing ones Front has with Jira, Asana, Trello, and Github.

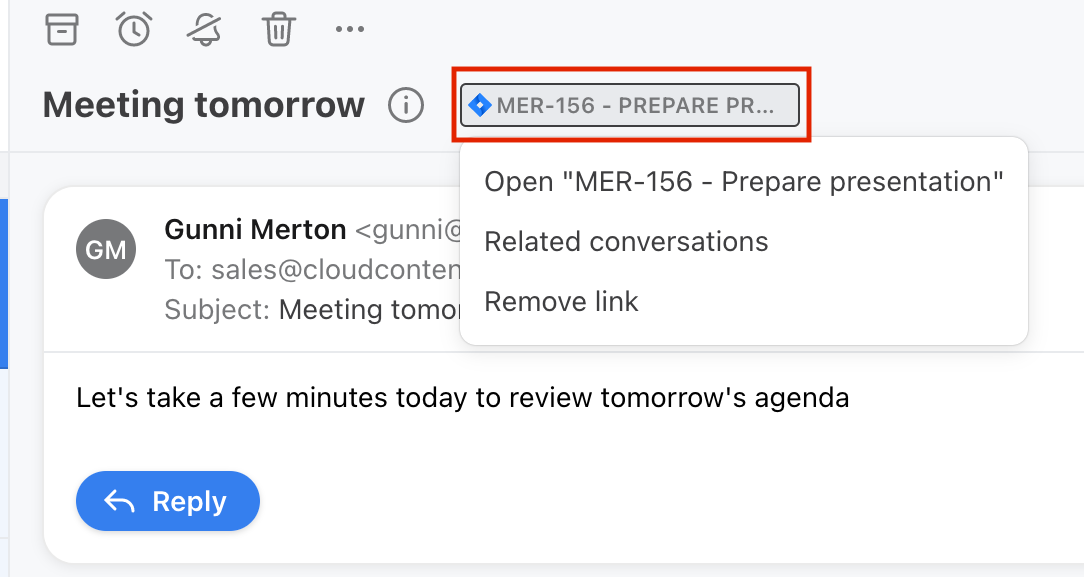
A Jira issue Link applied to a conversation in Front
Note that if you are just looking to build a custom Links integration connecting one of your services to your own instance of Front, you can simply use the Links endpoints directly.
Overview
At a high level, Link partner integrations have access to the following benefits:
- The ability to define a specific
typeof Link unique to their service, and set a unique icon for all Links of thattype. For example, Jira Links in Front havetype: jiraand are visually differentiated by the Jira logo - Webhook notifications whenever Links of their
typeare created in Front or added or removed from a conversation in Front, whether through the UI, Front Rules, or the Front API - The ability to make updates to conversations in Front that have your Links attached to them — for example, reopening archived conversations when a task in a project management tool is completed
- Marketing, discoverability, and other promotional benefits that promote the integration to Front’s customer base
For end users, Link integrations provide a number of benefits:
- The ability to easily attach features/bugs/orders/etc. from their existing tool to Front conversations via the UI, Rules, or API
- Two-way sync capabilities, where changes to a feature/bug/order/etc. automatically trigger changes to associated conversations in Front
- From their existing project-management/order-management/CRM tool, access all of the conversations in Front related to a particular feature/bug/order/etc.
We’ll walk through each of the steps necessary to build an integration below.
1. Registering as a Link partner integration
The first step is to fill out the partner application form to provide us some of the details of your intended integration.
We’ll reply to your application within 48 hours with any follow up questions, and then ask you to provide:
- a list of URL
patternsthat can be used to uniquely identify your Links. This pattern allows Front to properly notify your service when Links of your integration’s type are created. For example,*.atlassian.net/browse/*would match a Link created with the URLhttps://example.atlassian.net/browse/AB-123. - a webhook endpoint to be notified when Links are created or added/removed from conversations
- Webhook URL must be a
https:destination and must have a valid certificate. - optionally, you can also provide us with a
tokenfor Front to use to sign requests to your webhook. See verifying integrity details below. If not provided, Front will not sign the requests
- Webhook URL must be a
- an email associated with a Front developer account. If you don’t have one already, you can sign up for a free developer account here
Once we have these details, we’ll reply with OAuth client credentials you can use for step #2.
2. Authentication
Successful authentication first involves Front OAuth and then a webhook validation step.
Front OAuth
Users will start by enabling the integration from your application, starting an OAuth flow with Front. From your app (most likely a page within your app’s settings), users should be able to access a “Sign in with Front” button that they can use to initiate the OAuth flow. For the full details on how to implement OAuth, see the guide here. Note that OAuth authentication performed this way is specific to the Front company, not to one specific Front teammate.
Once the OAuth flow is completed, you should use the access_token to make a GET request to the following endpoint: https://api2.frontapp.com/me. This endpoint will respond with the name and ID of the particular Front company that you just completed the OAuth flow for:
{
    "_links": {
        "self": "https://api2.frontapp.com/me"
    },
    "name": "Acme Corp",
    "id": "cmp_abc"
}
You should store the id so you can map future webhook payloads to the proper company within your app.
Webhook validation
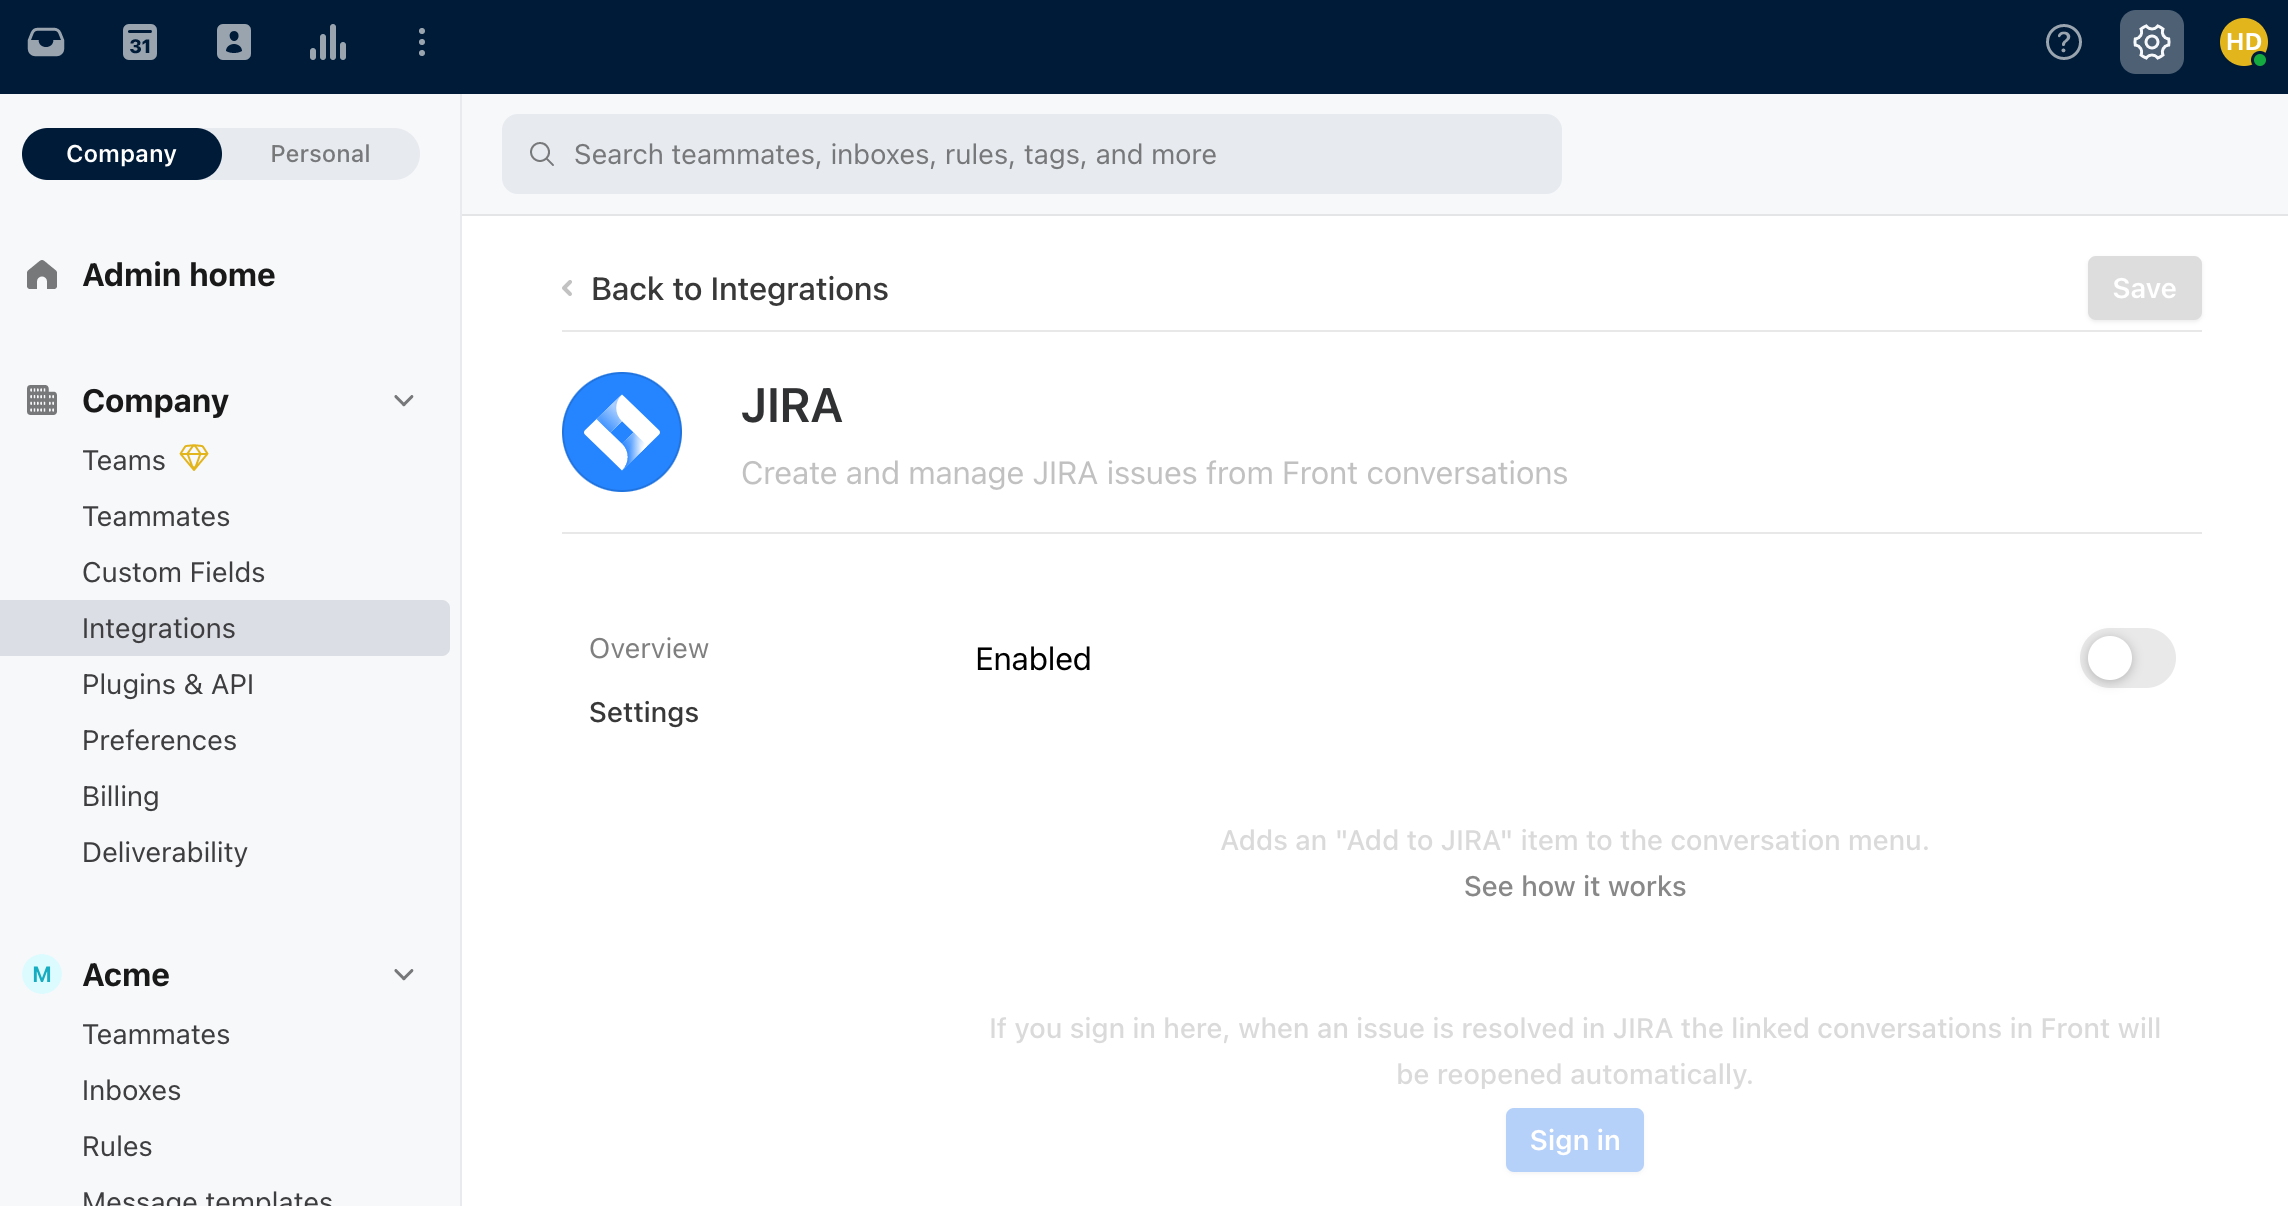
After a successful OAuth process, the user will return to Front and enable your integration from its page in Front settings. We will create this page for your integration after the registration process in step #1 (initially visible only to your developer instance).

Settings integration page for Jira
When the user enables the integration from Front settings, Front will send the following notification to the webhook URL provided in step #1:
Header:
{
  'x-front-signature' (if token provided in step #1),
  'x-front-request-timestamp' (if token provided in step #1), // timestamp in milliseconds
  `x-front-challenge`: <random string>
}
Body:
{
  type: 'sync',
  authorization: {
    id: "cmp_abc" // company id from /me
  },
  ts: 1632869241.975 // timestamp in seconds for request
}
Verifying integrity
These steps are only necessary if you provided a token to Front in step #1, and will allow you to verify that the incoming webhook originated from Front:
- Concatenate the stringified timestamp from the
x-front-request-timestampheader with a colon - Convert the string from step 1 to a buffer
- Take the buffer from step 2 and concat it with the raw request body
- IMPORTANT: always operate on the raw request body to ensure signature stability
- Convert the concatenated buffer from step 3 to a string.
- Apply the
hmacSHA256 algorithm using thetokenprovided during webhook configuration as the key [output in base 64]. - Compare the result from step 5 to the string provided in the
x-front-signatureheader.
Example Javascript implementation:
const baseString = Buffer.concat([Buffer.from(`${timestamp}:`, 'utf8'), buf]).toString();
const hmac = crypto.createHmac('sha256', token)
        .update(baseString)
        .digest('base64');
const fromFront = (hmac === signature);
Responding to the validation request
Because the authorization.id in the body of the request will be the ID of the company in Front that has just enabled your integration, you should be able to match it to the id you stored from the /me request made after the OAuth process.
To successfully validate the request, your webhook must reply:
- Within 10s
- With a status code
200 - A header
Content-Typeoftext/plain - A body that is the string from
x-front-challenge
If the response doesn’t meet the criteria above, the validation is considered failed. We will not retry the validation until: it is manually triggered by Front OR the integration is re-validated. We do not retry transient errors.
Once you’ve successfully responded, Front will begin sending your webhook notifications about your Links.
3. Handling Link webhooks
There are two types of Link webhooks you’ll need to handle:
link_created— when a new Link is created of your integration’s type, either through the UI, rules, or APIconversation_event_created— when a Link is added or removed from a Front conversation
Link created
Example:
{
  type: "link_created",
  ts: 1631299461.778, // timestamp in seconds
  authorization: {
  	id: "cmp_abc"
  },
  payload: {
    _links: {
      self: "https://acmecorp.api.frontapp.com/links/top_123"
    },
    id: "top_123",
    name: "AB-123 - Fix signup page bug",
    type: "jira",
    external_url: "https://acmecorp.atlassian.net/browse/AB-123"
  }
}
When you receive link_created event, we recommend that you handle it by:
- Using the
authorization.idand theexternal_urlto fetch the issue/bug/task/etc. in your system - Associating the
idof the Link with the issue/bug/task/etc. that you just fetched - (Optional but recommended) Create a URL of the following form:
https://app.frontapp.com/open/top_123(wheretop_123is the ID of the link) and save it in the description of your issue/bug/task/etc. This will allow users to easily open a URL to see all conversations related to a particular issue/bug/task/etc. in Front - (Optional but recommended) Respond to the webhook to set a
namefor the Link (if it doesn’t already have one). You can use the following response format:
{
  type: 'success',
  name: "AB-123 - Fix signup page bug"
}
Link added or removed from a conversation
Example:
{
  authorization: {
    id: "cmp_1"
  },
  ts: 1634833622.503,
  type: "conversation_event_created",
  payload: {
    _links: {
      self: "https://api2.frontapp.com/events/evt_a"
    },
    id: "evt_a",
    type: "link_added",
    emitted_at: 1634833622.459,
    conversation: {
      _links: {
        self: "https://api2.frontapp.com/conversations/cnv_1",
        related: {
          events: "https://api2.frontapp.com/conversations/cnv_1/events",
          followers: "https://api2.frontapp.com/conversations/cnv_1/followers",
          messages: "https://api2.frontapp.com/conversations/cnv_1/messages",
          comments: "https://api2.frontapp.com/conversations/cnv_1/comments",
          inboxes: "https://api2.frontapp.com/conversations/cnv_1/inboxes"
        }
      },
      id: "cnv_1"
    },
    source: {
      _meta: {
        type: "api"
      },
      data: null
    },
    target: {
      _meta: {
        type: "link"
      },
      data: {
        _links: {
          self: "https://api2.frontapp.com/links/top_1"
        },
        id: "top_1"
      }
    }
  }
}
The payload will be an Event preview with type of either link_added or link_removed.
When you receive a conversation_event_created event with a link_added or link_removed payload, we recommend doing the following:
- The
payload.target.data.idwill represent the ID of the Link that has been added or removed. Use this ID to check whether you have already mapped this Link to the issue/bug/task/etc. in your system — if not, see the recommended steps for “Link Created” - Optionally, use the metadata in the payload (such as the
payload.conversation.id) to fetch the conversation and add more details to the issue/bug/tasks/etc. in your system. For example, a project management tool might add a new line in the description of a task for each conversation that becomes attached to the Link
4. Making updates to Front
As a result of the OAuth process, your app will have permission to fetch and make updates to various resources in Front on behalf of the customer. To see the full list of API endpoints, see the reference. There are two common scenarios in which you should use the Core API.
Updating the name of a Link
When a Link is initially created in Front, you reply to the link_created webhook to set a name for the Link (see step 3). But if the name of the bug/issue/task/etc. changes in your system in the future, you should use the Update a link endpoint to set the display name of the Link to match the latest.
Updating conversations related to a Link after a status change
When the status of a bug/issue/task/etc. in your system changes, it’s recommended that you update the conversations related to the associated Link in Front. For example, you could re-open conversations in Front related to a bug that gets fixed. To do so:
- Use the List link conversations endpoint to list all of the conversations associated with a particular Link
- Use the Update conversation endpoint to set the
statustoopen, or take some other actions such as adding a comment or applying a tag
5. Creating a plugin
Depending on the integration you want to build, you may want to provide users with a custom UI embedded in a Front plugin. The Front Plugin SDK allows you to embed an app within the sidebar that can interact with the Front in a number of ways. For example, the plugin could support:
- Creating and attaching new tasks/bugs/orders/etc. to conversations directly from the plugin. You can use the addLink method to do so
- Automatically display extra metadata details related to the tasks/bugs/orders/etc. attached to the currently-open conversation in Front. You can subscribe to changes in the Front context and check the topics on the conversation model
Publishing
Once you’re ready to go live, respond to the existing email thread with us to let us know so we can work with you to publish everything publicly.
Updated about 1 year ago
