
Install the Chat Widget in an iOS app
The Front iOS SDK enables you to add Front Chat to your native iOS apps for real-time, chat-based support. Complete the steps in this guide to get started.
The Front iOS SDK is in betaWe encourage you to report issues and provide feedback on our GitHub repo.
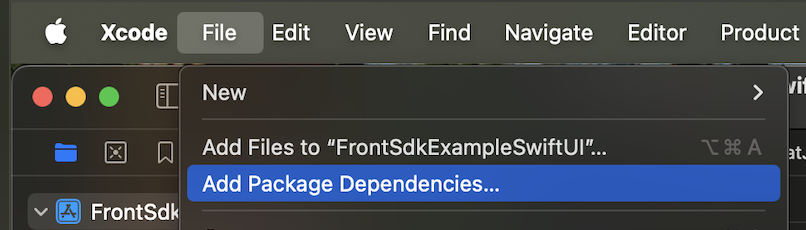
Install the Front SDK in Xcode
-
In Xcode, go to File > Add Package Dependencies.
-
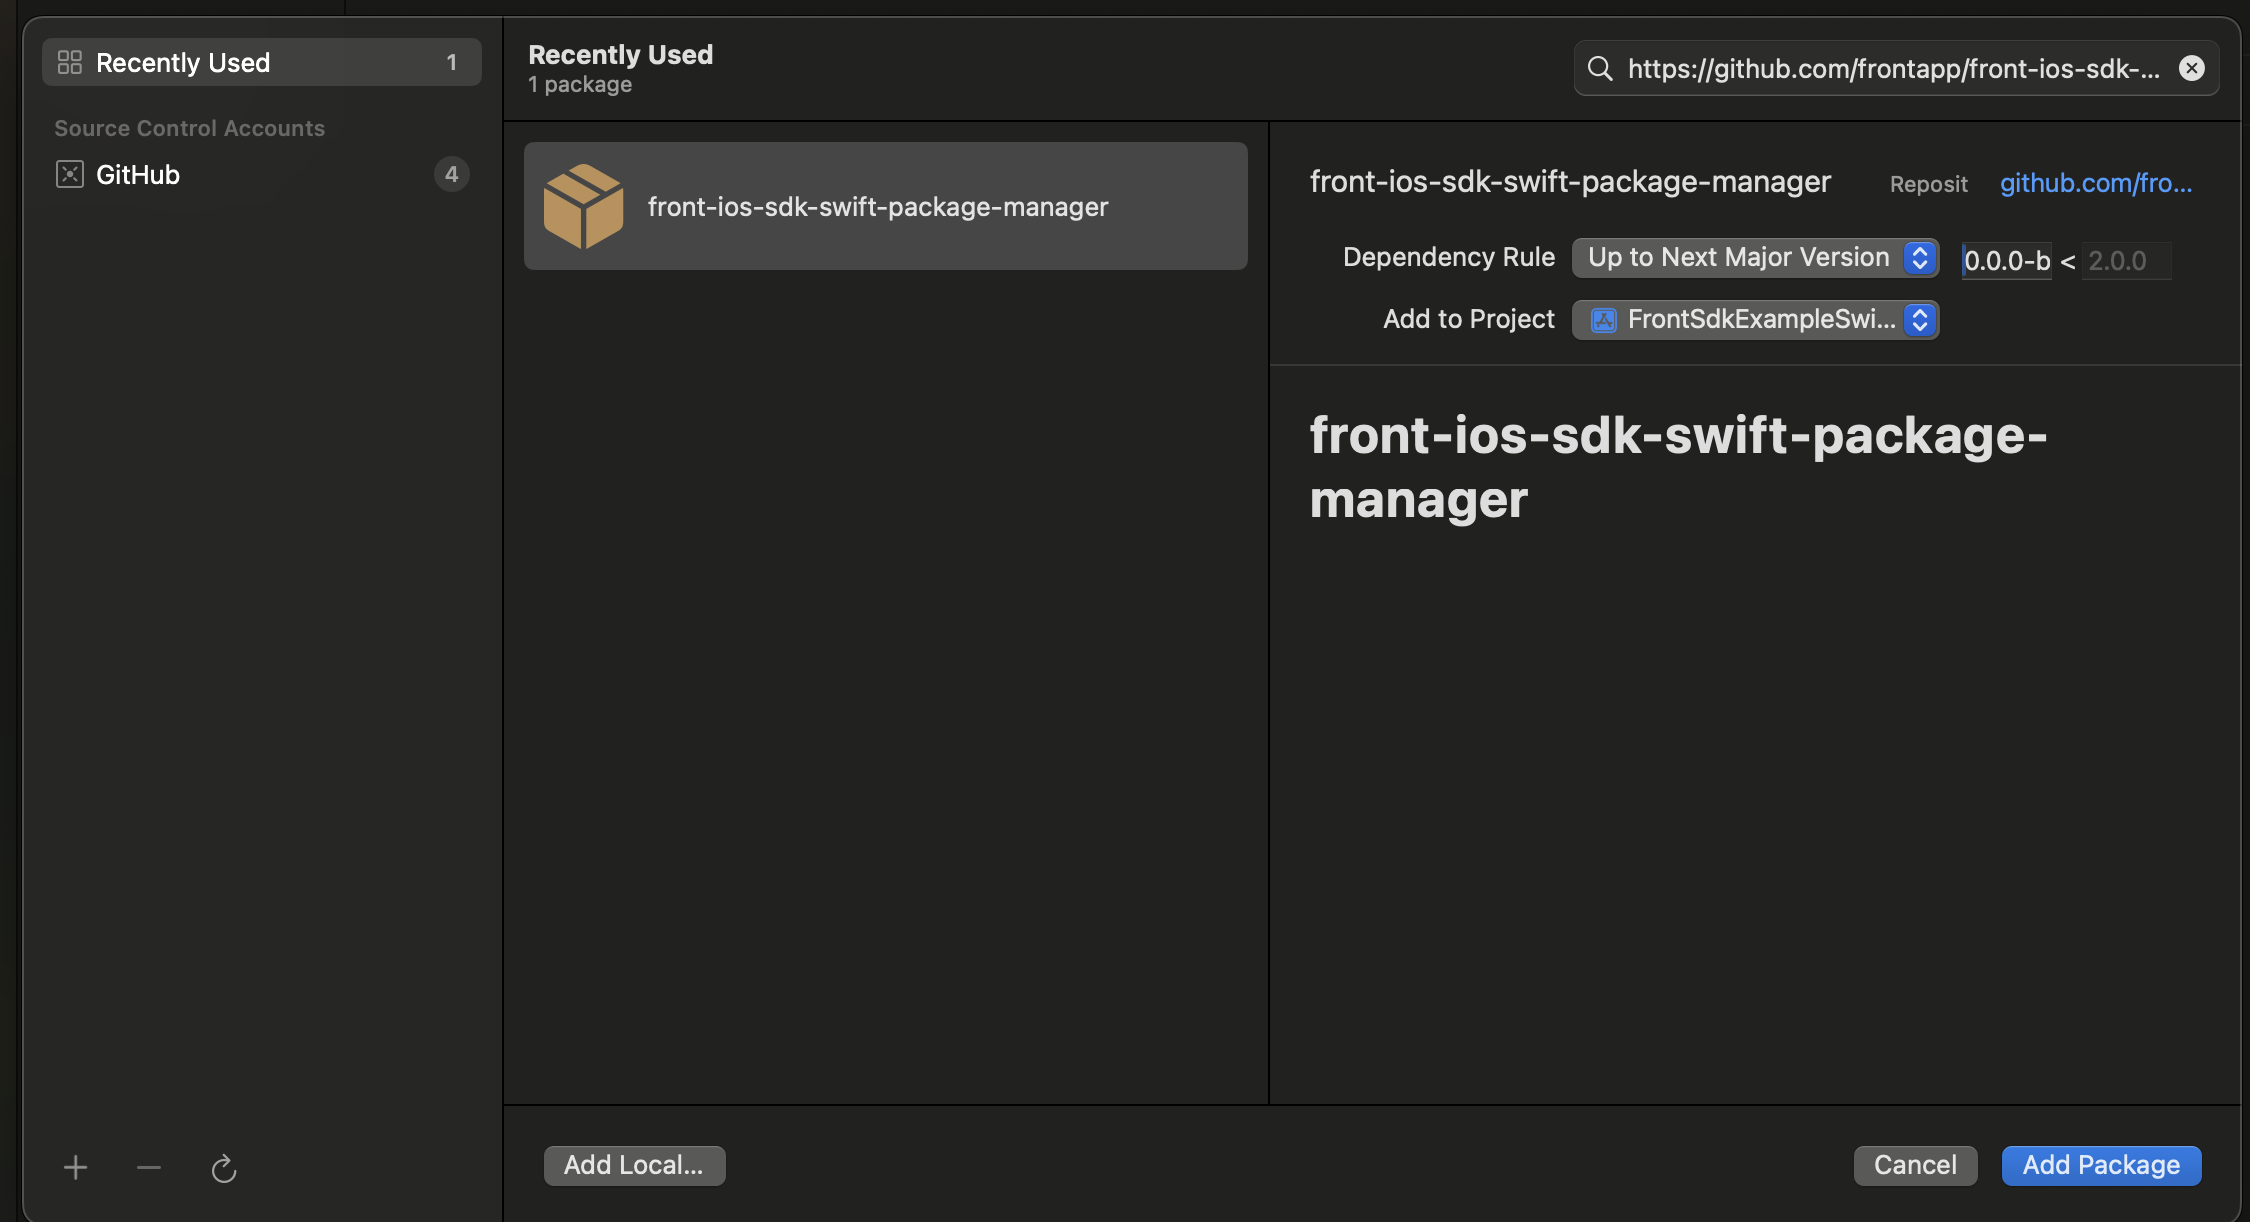
Add https://github.com/frontapp/front-ios-sdk-swift-package-manager as a Swift Package Repository.
Front recommends selecting Up to Next Major Version for the Dependency Rule option.
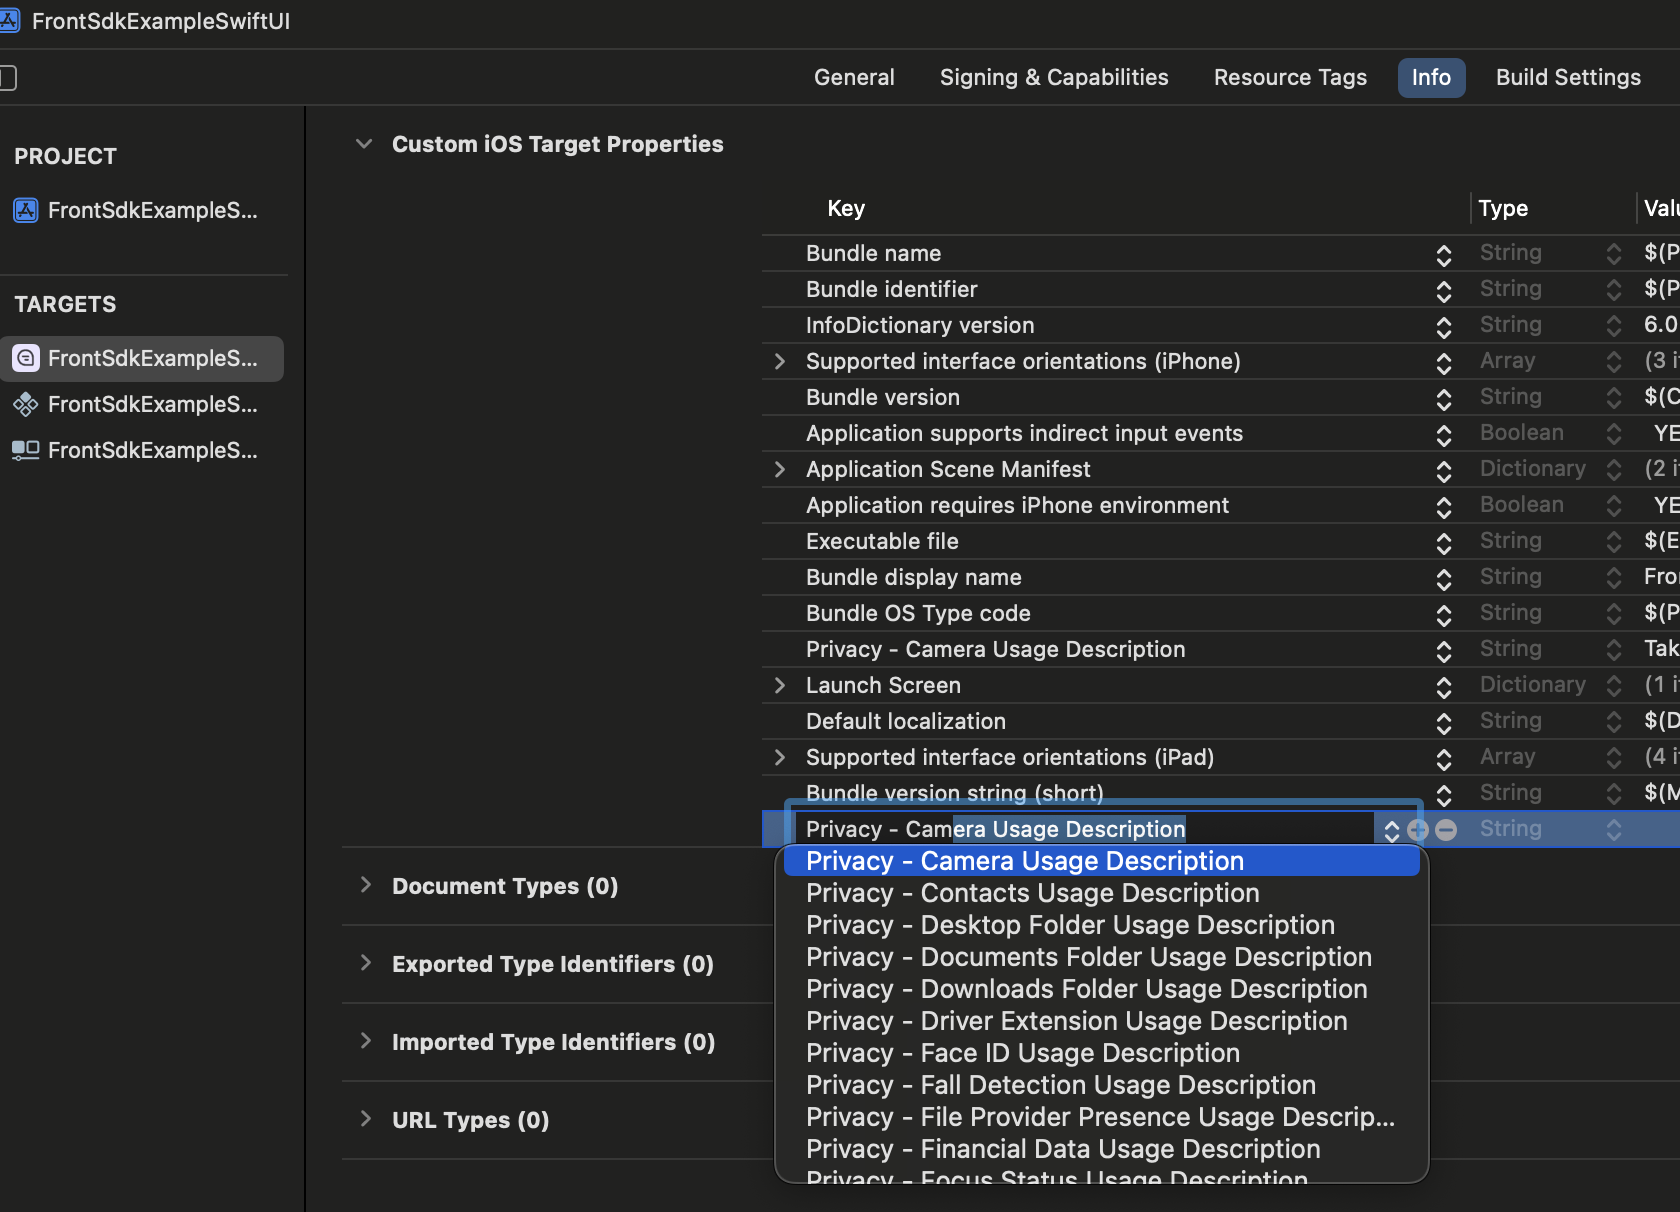
Update Info.plist for camera permissions
Users of Front Chat can upload images while in a conversation. This requires your app to have an entry for NSCameraUsageDescription.
-
Click the + sign on any row in the Info tab for your Target and select Privacy - Camera Usage Description.
-
Add a user-facing description for the value column. For example, “Take a picture to help the agent resolve your issue.”
Configure Front Chat
-
Go to Settings > Channels in Front.
-
Search for or click on the channel you are using for Front Chat.
-
Open the Installation tab and identify the
chatIDwithin the Widget code snippet.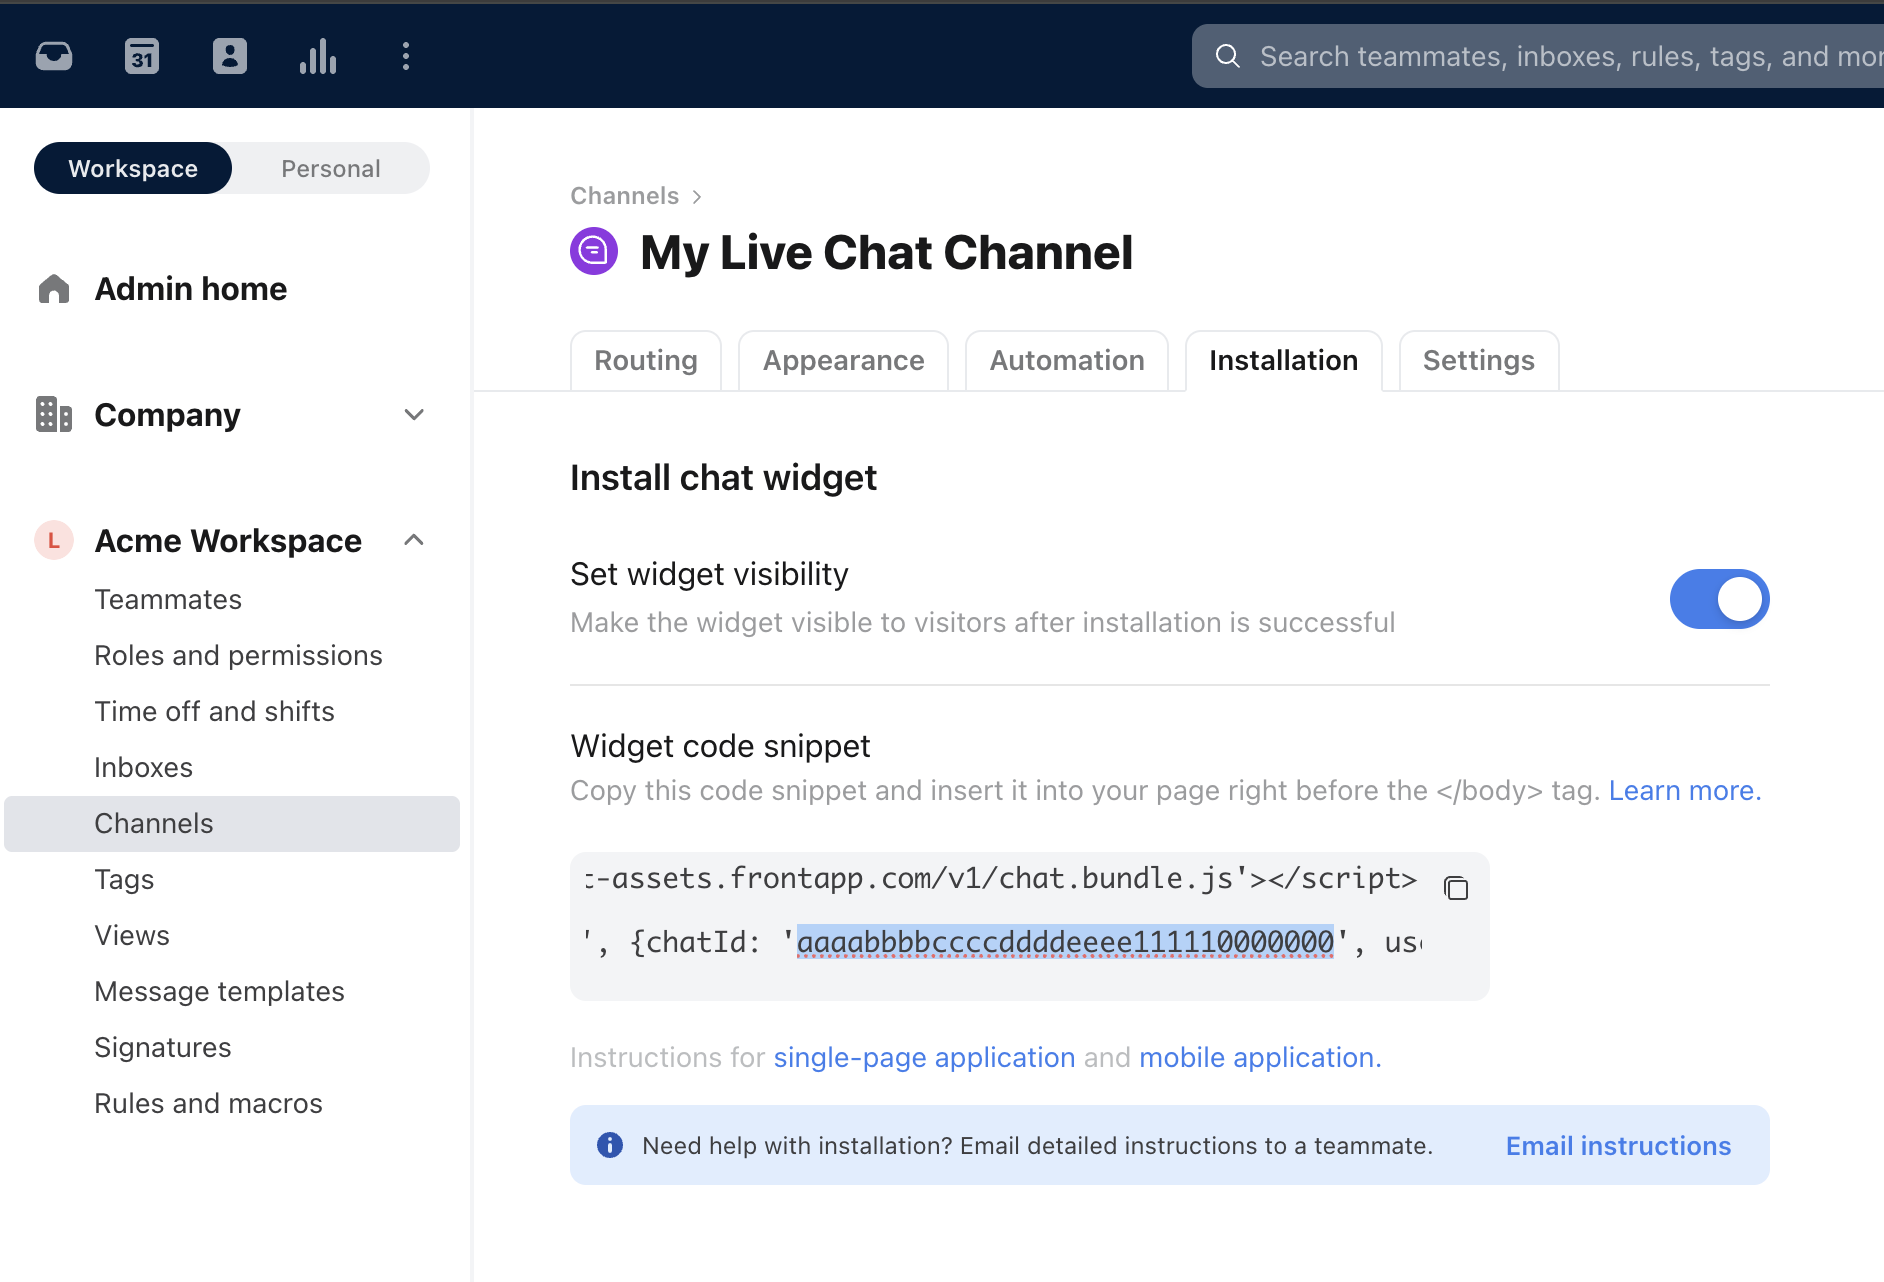
-
Configure an instance of
FrontChatConfig.let config = FrontChatConfig( chatId: "<Your chat ID>" ) -
If you are using the Verified Users feature, add the appropriate parameters. Refer to Identify users for more information.
let config = FrontChatConfig(
    chatId: "<Your chat ID>",
    email: "<user email>",
    userHash: "<user hash generated by your backend using the verification secret",
    name: "<user name>",
    customFields: ["custom_field_1": .string("value_1")],
    contact: Contact(
        email: userEmail,
        customFields: ["custom_field_1": .string("value_1")]
    )
)
Present the FrontChatView
Refer to the code snippets below for an introduction to presenting the FrontChatView in your project. For full working code examples, visit our GitHub repo.
SwiftUI example
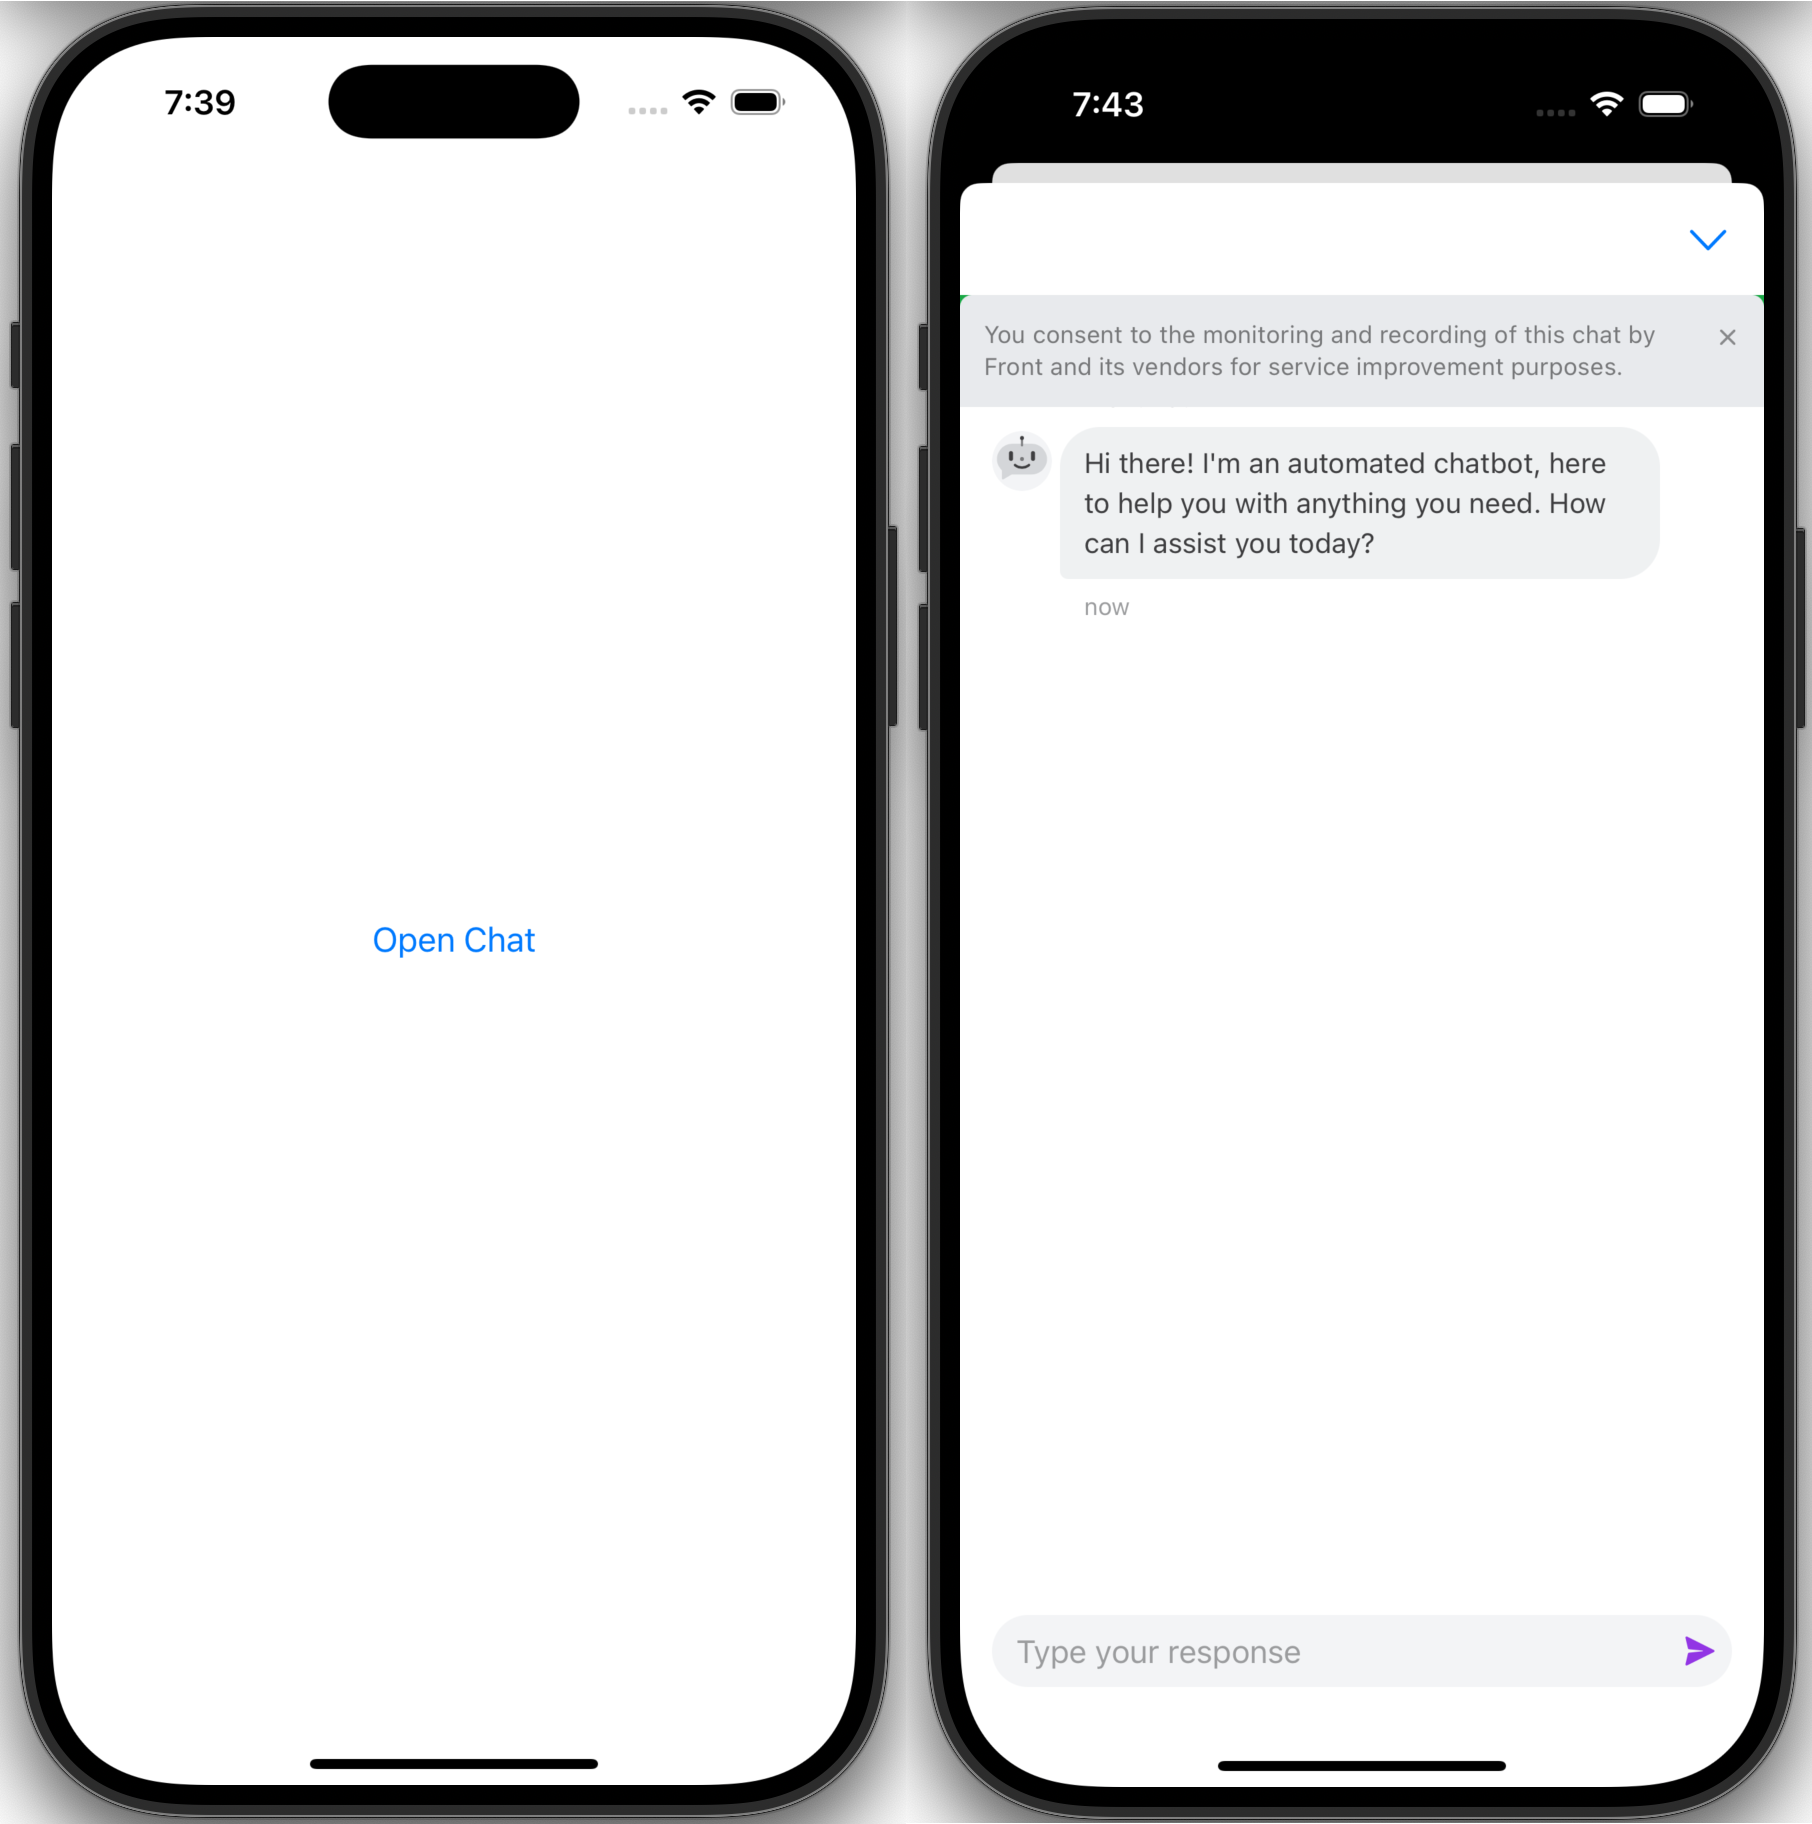
The FrontChatView view can be used like any other SwiftUI view. Here, we’ll present it as a modal sheet when the “Open Chat” button is tapped.
import SwiftUI
import FrontSdk

struct ContentView: View {
    @State private var showingFrontChat = false

    var body: some View {

        // Add a button that launches FrontChatView on tap
        Button("Open Chat") {
            showingFrontChat.toggle()
        }
        .sheet(isPresented: $showingFrontChat) {
            NavigationStack {

    		 // Declare FrontChatView as the view to present
	         FrontChatView(config: FrontChatConfig(chatId: "<your chatId>"))
                .toolbar {

       		    // Give the user a way to close the view
                    ToolbarItem(placement: .topBarTrailing) {
                        Button(action: {
                            showingFrontChat = false
                        }) {
                            Label("", systemImage: "chevron.down")
                        }
                    }
                }
            }

        }
    }
}
UIKit example
If your project is UIKit based, you can’t use FrontChatView directly because it is implemented using SwiftUI. Instead, Apple provides the UIHostingController for this use case. Here we’ll assume a similar app that has an “Open Chat” button that displays the FrontChatView modally.
class ViewController: UIViewController {

    @objc func launchFrontChat() {

        // Configure an instance of FrontChatView and present it using UIHostingController
        let frontChatView = FrontChatView(config: FrontChatConfig(chatId: "<your chatId>"))

        let hostingController = UIHostingController(rootView: frontChatView)

        // Add a close button on the navigation bar
        hostingController.navigationItem.rightBarButtonItem = UIBarButtonItem(
            image: UIImage(systemName: "chevron.down"),
            style: .plain,
            target: self,
            action: #selector(dismissChat)
        )

        let navController = UINavigationController(rootViewController: hostingController)
        present(navController, animated: true, completion: nil)
    }

    @objc func dismissChat() {
        dismiss(animated: true, completion: nil)
    }
}
Handle loading state and errors
When you run the examples above, you’ll notice there’s a loading state before the UI comes into view. This is due to the current implementation relying on a webview that loads the same code as Front Chat for web.
Below we have code samples to show how to customize the loading state and handle errors due to things like network issues that cause FrontChatView to fail to load. For working examples, visit the GitHub repo.
SwiftUI example
Add an instance of FrontChatViewModel as a @StateObject .
import SwiftUI
import FrontSdk

struct ContentView: View {
  ...
    @StateObject private var viewModel = FrontChatViewModel()
  ...
    var body: some View {
        ...
        FrontChatView(... viewModel: viewModel)
    }
}
Use the loadingStatus property of FrontChatViewModel to display a different UI as needed.
import SwiftUI
import FrontSdk

struct ContentView: View {
  ...
    @StateObject private var viewModel = FrontChatViewModel()
  ...
    var body: some View {
        ...
        if viewModel.loadingStatus == .failedLoading {

            // Show error UI
            VStack {
                Text("Failed to load Chat.")
                Button("Ok") {
										// Reset the viewModel state for the next launch of FrontChatView
                    viewModel.reset()
                }
            }
        } else if viewModel.loadingStatus == .startedLoading {
	      // Show custom loading indicator UI
              ProgressView()
                  .progressViewStyle(CircularProgressViewStyle())
                  .scaleEffect(1.5)
        } else {
            // Show FrontChatView as normal
            FrontChatView(... viewModel: viewModel, enableLoadingIndicator: false)
        }
    }
}You only need to set
enableLoadingIndicator: falseif you wish to implement a custom loading indicator UI.
Reference for FrontChatViewModel properties
FrontChatViewModel properties| Name | Type | Description |
|---|---|---|
loadingStatus | FrontChatViewLoadingStatus | An enum with possible values:
|
loadingError | Error? | An instance of Error returned by the webview on navigation failure. Corresponds to loadingStatus == failedLoading. |
didEncounterUnrecoverableError | Bool | Set to true if the web app loaded by the webview encounters an exception. On the web, the user is prompted to refresh. |
unrecoverableErrorMessage | String? | A human readable message populated when didEncounterUnrecoverableError is set to true. |
UIKit example
For a UIKit based project, you can use the FrontChatWebViewDelegate to hook into the same functionality.
public protocol FrontChatWebViewDelegate: AnyObject {
    func didStartLoad()
    func didFinishLoad()
    func didFailLoad(with: Error)
    func didReceiveUnrecoverableError(message: String)
}
Updated over 1 year ago