
Create, manage, and publish apps
The Front Platform allows you to create and manage apps directly in Front. These apps can be private to one customer or be made available to all customers through the App Store. Whether you are building backend integrations with the Core API, creating a UI element with a plugin, adding a new channels to Front, or building with our no-code Connectors framework, you will deploy your integration as an app in Front.

You must be a company admin to create or manage apps.
Quick links within this topic
- Create an app
- Add an app channel feature to your app
- Add a plugin feature to your app
- Add a Connector feature to your app
- Add a webhook feature to your app
- Add an application trigger feature to your app
- Obtain OAuth credentials
- Configure a server for your app
- Publish your app
Create an app
To create an app:
- Go to Settings in Front.
- Select Company from the dropdown menu.
- Click Developers to open the Developers page.
- Click Create app.
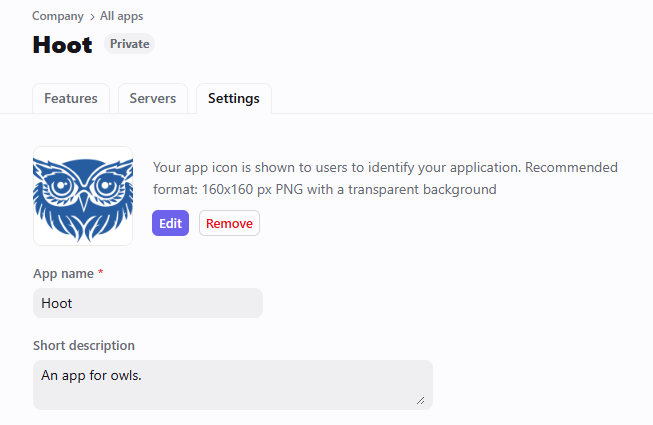
- Under Settings, provide an App name and Short description.
- Edit the default app icon.
- Click Save.
Choose public-facing valuesThe app name, short description, and icon display to end users of your app, so choose appropriate public-facing values.
Add features to your app
After configuring a basic app container, click on the Features tab tod ecide which features your app needs. The following features are available:
- App channel—Allows you to connect a messaging source to your app (SMS providers, social media channels, live chat widgets, etc.) so users can send and receive messages within a Front inbox. Utilizes Channels.
- Plugin—Embeds a custom web app into Front that allows users to obtain additional context on a conversation or perform actions that leverage or propagate to a third-party system. Utilizes the Plugin SDK.
- Connector—Activates Connectors that link Front to external systems through a no-code integration framework.
- Webhook—Adds an event listener that notifies an external server of different Front events.
- Trigger—Listens for events in external systems in order to initiate workflows in Front.
- OAuth—Allows users to authorize external system access to Front instances for purposes of syncing data or performing programmatic actions.
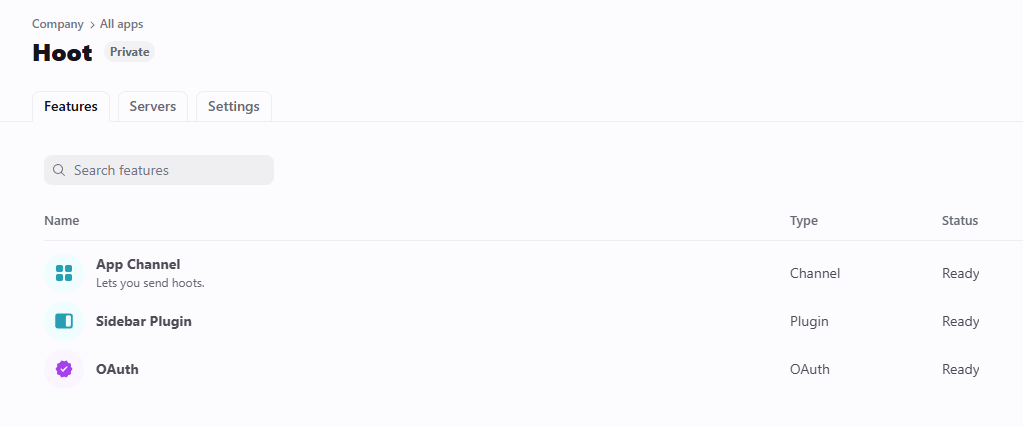
After you add features as described in the preceding links, your app displays them in the Features tab:
Create an app channel
- Click an app on the Developers page to view its details.
- Click the Features tab.
- Click Add feature.
- Click App Channel.
- Configure the channel settings as explained in the following table.
| Setting name | Description |
|---|---|
| Short description | A public-facing summary of the application channel's intended use. This description shows up to Front users when they select your application channel during inbox configuration. |
| Webhook URL | The URL where your server will run and listen for updates from Front. The server origin is configured on the Servers page or through the origin dropdown. Note that channels only support Bearer or OAuth authentication. For purposes of development, you can set up a local server using a tool like ngrok. When you are ready to deploy your channel to production, you can replace the development URL with your production URL. |
| Contact type | Select the type of message your application channel uses.
|
| Supported attachments | The attachments that your channel will support sending or receiving. The list includes text, audio, video, and images. If you do not enable an attachment type, users may encounter errors when attempting to include those attachments in the Front composer.
|
| Allow > Reply | Allows users to reply to messages received through the application channel (enabled by default). |
| Allow > Compose | Allows users to compose new outbound messages through the application channel (enabled by default). |
| Allow > Templates | Allows the channel to support message templates synced from the external service the channel connects to. Learn more about Application Channel Message Templates. |
| Allow > Autocomplete mentions | Enables users to view a list of contacts available for @mention while typing in your channel. Requires you to set up the logic that powers the @mention autocompletion as described in this section. |
| Composer type | Whether the application channel should render a Basic or Advanced message composer. Learn more about composer types. |
| Timeline UI Type | Whether the application channel should use a standard timeline (optimized for traditional communications like email) or a chat timeline (optimized for real-time communication like SMS and chat). Learn more about the timeline differences. |
| Credential type | Private credentials let users authorize with your service and select a single resource to connect—for example, one phone number from their account. To connect a second number, the user creates a separate channel instance in Front and authorizes again, either with the same credentials or different ones. Use private credentials if your service's credentials only provide access to one resource, or if you want to encourage users to authenticate separately for each connected resource. Shared credentials let users authorize once and select multiple resources to connect—for example, several phone numbers from the same account. Each resource still maps to its own channel instance in Front, but users don't have to log in repeatedly. The trade-off is that if the shared credentials are invalidated, all channel instances using them are affected at once. Use shared credentials when a single set of credentials typically manages multiple resources in your service. Shared credentials require extra handling steps on your end, as explained in the application channels topic. |
- Click Create.
Note the app credentials when adding an app channel featureWhen building an app with an application channel feature, note the App UID and App secret on the Settings tab of your app. You use these values in your channel integration. For more information, refer to Getting Started with Application Channels.
Create a plugin
You can create two types of plugins for your apps: sidebar plugins and composer plugins. Sidebar plugins display in the integration sidebar while composer plugins display in the message composer. Learn more about plugins on the Plugins Overview page.
Create a sidebar plugin
- Click an app on the Developers page to view its details.
- Click the Features tab.
- Click Add feature.
- Click Sidebar Plugin.
- Configure the plugin settings as explained in the following table.
| Setting name | Description |
|---|---|
| Sidebar URL | The URL where you will host your plugin application. While you are developing your plugin, you can set the URL to the localhost port where your development app will run (for example, |
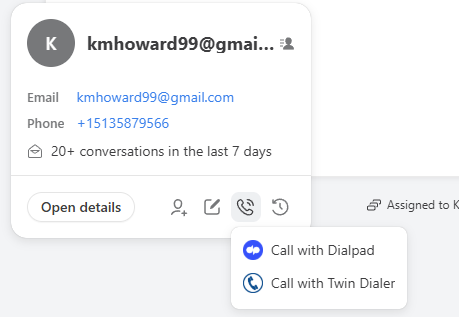
| Call via plugin | (Disabled by default—consider enabling if you are building a phone dialer plugin) Allows users to open the plugin when they click the Call button next to a contact's phone number in the Front UI. Information about the phone number the user clicked is passed in the EntryPoint property of the plugin's Context.
|
| Run in background | Allows the plugin to keep running when it is unfocused or minimized in Front. Enable this feature for plugins that need to alert users of important events (such as a new phone call being received), but do not enable it otherwise—this best practice prevents fatiguing users with distractions. Pair this setting with the displayNotification and dismissNotification Plugin SDK functions. |
| Components | The components your plugin needs to access.
|
| Server | Select a server if you want to handle user authentication through Front using an app server. |
| Redirect URI | Note this URL if you want to authorize authentication requests from Front. |
| SDK version | (Read only) Defaults to the latest SDK version. |
| Auth secret | (Read only - displays after creation) A security mechanism that allows you to verify that the plugin traffic is coming from Front. Read about how to implement the auth secret in our Plugin Security topic. |
- Click Create.
Create a composer plugin
- Click an app on the Developers page to view its details.
- Click the Features tab.
- Click Add feature.
- Click Composer Plugin.
- Configure the plugin settings as explained in the following table.
| Setting name | Description |
|---|---|
| Composer plugin URL | The URL where you will host your plugin application. While you are developing your plugin, you can set the URL to the localhost port where your development app will run (for example, |
| Components | The components your plugin needs to access.
|
| Server | Select a server if you want to handle user authentication through Front using an app server. |
| Redirect URI | Note this URL if you want to authorize authentication requests from Front. |
| Auth secret | (Read only - displays after creation) A security mechanism that allows you to verify that the plugin traffic is coming from Front. Read about how to implement the auth secret in our Plugin Security topic. |
- Click Create.
Create a Connector
Connectors allow you to transform URLs or strings found in comments or messages into structured Orders, Shipments, Itineraries, Tasks, etc. that are easy to access right from a conversation in Front. They also allow you to make API requests to external systems.
To learn how to add a Connector feature to your app, refer to our Help Center article.
Learn more about Connectors on our Developer Portal.
Create a webhook
Application webhooks allow you to be automatically notified when something happens in Front without having to constantly poll the API. To learn more about this feature, refer to our Webhooks topic.
To add a webhook to your app:
- Click an app on the Developers page to view its details.
- Click the Features tab.
- Click Add feature.
- Click Webhook.
- Configure the webhook settings as explained in the following table.
Your server must be ready during configuration.The server must be live at the time of configuration, and must respond successfully as described in the Webhooks topic.
| Setting name | Description |
|---|---|
| Webhook URL | The URL where your server is listening for the webhook request. The server must be live at the time of configuration, and must respond successfully as described in the Webhooks topic. |
| Webhook Server | Choose a server instead of a URL if you want to authenticate requests to your webhook server. You can select an existing server configured on your app or create a new one. Choosing a server helps you differentiate webhook events from different customers because your server can receive unique authentication credentials from each customer when your app is installed. |
| Subscribed events | Select all the events that you want the webhook to listen for. |
OAuth is required for published appsIf your webhook is part of an app that you are publishing on our App Store, you must add OAuth to the app so that customers can authorize that Front events be sent to your webhook from their instance.
Create an application trigger
Application triggers allow you to execute workflows in Front in response to an external event. Refer to the Application triggers topic for details.
To add an application trigger to your app:
You must have at least one application object configured in your app before you can add an application trigger.Application triggers identify an application object in the request sent to Front. This application object must live in the same app as the application trigger. When the triggering event is received, you can execute rules on conversations that have the associated application object attached.
-
Click an app on the Developers page to view its details.
-
Click the Features tab.
-
Click Add feature.
-
Click App trigger.
-
Configure the application trigger settings as explained in the following table.
Setting name Description Name A descriptive name for your application trigger so that you can identify it later in the list of triggers for the app. Event type The unique name for the event you are sending in your application trigger request. For example, you might create an application trigger for when a new order is created in an external system and a second application trigger for when an order is fulfilled. When you trigger the events using the Trigger application event endpoint, you might send "event_type": "order_created"for the first trigger and"event_type": "order_fulfilled"for the second trigger. The event types areorder_createdandorder_fulfilledfor the first and second application triggers, respectively.Description An optional description of what the trigger does. Provide example event Send a test event through the Trigger application event with the dryRunquery parameter set totrue. You can use any value for theext_linkoridrequired for theapp_object. Refer to the Application triggers topic for details.
If your event is successful, you will see the event data populate in the Event payload section.Extract event data Optionally extract additional properties from the event data so that you can use these properties in rules whenever they are sent to Front via a triggering event. The properties will be accessible as dynamic variables in rules that use your application trigger as their rule trigger (via the App event is received rule trigger). Preview event data Click Preview to confirm that the trigger successfully extracts the properties you want to use in dynamic variables.
After you save your application trigger, you can send events to Front and have those events trigger rules on conversations with the application objects identified in the trigger.
Obtain OAuth credentials for your app
Every app you create on the Front Platform supports OAuth. Front recommends that you implement OAuth for apps that need to fetch or update data from Front on behalf of a Front user. If you are publishing your app to the App Store, OAuth becomes a requirement for receiving and utilizing data through the Core API or webhooks for any customers that install your app.
End users authorizing OAuth apps must be admins. This applies to both private and public OAuth apps.
You can use OAuth to authorize requests to the Core API or to authorize users for your app channel or to receive webhook events from other customer instances. By implementing an OAuth flow, an authorized app receives an access token to make requests to Front for authorized data.
Complete the following steps to view your OAuth client ID and secret and to configure redirect URLs:
- Click an app on the Developers page to view its details.
- Click the Features tab.
- Click Add feature.
- Click OAuth and then Enable OAuth.
- Note the Client ID and Client secret.
- Click Add Redirect URL to authorize a URL for the server to redirect to after a successful authorization. You can add multiple redirect URLs, but Front recommends you delete your development URLs once your app is live.
- Specify the features, namespaces, and permissions that you want users to authorize for your token.
Features
The following features specify what functionality your token can be used for:
- Access resources allows you to manage Core API resources such as conversations, contacts, inboxes, etc.
- Auto-provisioning allows you to manage provisioning resources using our SCIM implementation, which you have to contact our team to learn more about (not generally available to the public).
- Application triggers allows you to process events and payloads from external services (not currently available for OAuth tokens).
- MCP server allows you to connect Front data exposed via MCP server to clients like Claude, ChatGPT, and others.
NamespacesThe following namespaces specify the scope of tokens:
- Global resources are resources available across the company. These are resources created at the company level such as company-level rules, company-level tags, or resources that only exist at the company level, such as teams or accounts. Global resources exclude resources that belong to to specific workspaces, which are separately configured as shared resources.
- Shared resources are resources that belong to specific workspaces, such as shared inboxes or workspace tags. You can select All shared workspaces to manage resources across all your workspaces.
- Private resources are resources that belong to individual teammates, such as personal inboxes or signatures. The teammate will have to enable API access in their settings for the token to manage their resources.
PermissionsIf you selected to access resources, you can granularly specify what access the token has to each resources (read, write, delete, and send).
Tips for using permissions
- Refer to the API endpoint topics in the Core API reference documentation to learn which permissions are required for each endpoint.
- Front recommends limiting the permissions for each token to prevent misuse or security issues.
- The following permissions exist:
- Read for retrieving resource information.
- Write for creating and updating resources.
- Delete for removing API resources.
- Send for creating and sending messages in Front, such as you would do with endpoints like Create message, which start new conversations or reply to active conversations. This is different from endpoints that import historical messages, which only require the Write permission.
To learn more about how authentication works on the Front Platform, refer to the following links:
Configure servers for your app
Servers allow you to define how users authorize or make requests through your app. By configuring a server, you can have Front handle user authentication on your behalf. Your server can then authorize the users and make requests.
To create a server:
- Click an app on the Developers page to view its details.
- Click the Servers tab.
- Click Create server.
- Configure the server settings as shown in the following table.
| Setting name | Description |
|---|---|
| Origin | The root domain for the authorization server.
|
| Authentication strategy | Specify whether the server uses Basic Authentication, Bearer Authentication, or OAuth. |
- Specify any additional information needed based for the authentication strategy you selected.
- Click Create.
After you configure a server, you can select to use it for authorization when configuring features, such as app channel or Connectors, that support authorizing users through a configured server origin.

Servers are limited to 1200 requests per minute.
Publish your app
Publish a private app
By default, apps are private to the Front instance they are created in. Once you create an app, you do not need to take additional steps for it to be available to Front users in that instance, aside from notifying them that the app is complete and ready to use. Private apps display a Status of "Private" in the app list and show a Private pill on the Settings tab.

Publish an app to all Front customers on the App Store
If you want to make an app available for all Front customers to use, you must publish your app. The app will then display in the App Store within Front (available under Settings > Company > App Store) and on our integration website.
To publish your app, notify our team as described in the Partnering with Front topic.
Making changes to a published appOnce your app is published to all customers, you cannot make direct changes to it. Instead, create a new app to test your changes, and then notify us using the email thread created when we first published your app.
Need a Front logo? Check out our press kitReview our guidelines and download the latest Front logos and other assets in our press kit.
Updated 4 months ago