
Getting Started with Application Voice Channels
This tutorial guides you through the process of creating a voice application channel in Front. The channel in this tutorial will be able to create and receive outbound voice calls from a generic call service, and will be able to sync transcripts, recordings, and other associated call data to Front, with just a little code modification on your end. If you're interested in an application channel that processes normal text-like messages, refer to the Getting Started with Application Channels guide.
Some of the capabilities of the voice channel described in this tutorial include:
- Authorizing Front users connecting with your channel.
- Instantiating a new channel.
- Processing call status events.
- Adding call summaries, transcripts, and recordings to a conversation.
The tutorial is based on a voice channel template that you can use as a starter project for any channel integration. This starter project is meant to kickstart your development of a fully-fledged channel integration that you can make available to all Front customers. By using the starter project as a code template and reading this tutorial for reference, you should be able to save development time and learn the key concepts necessary for building successful channel integrations with Front.
Quickstart
If you prefer to get the code in this tutorial up and running quickly prior to reading through the rest of this tutorial, refer to the Readme in our GitHub repository for condensed instructions.
Prerequisites
When configuring an application channel for voice calls, make sure to enable the following settings when creating your app:
- Add an application channel feature to your app.
- Use a Phone contact type for the channel
- Decide whether your channel should use private or shared credentials.
- Add a sidebar plugin feature to your app. This allows you to visualize the call and related assets.
- Use the Call via plugin setting to allow users to open the plugin through the Call button next to a contact's phone number. Information about the phone number the user clicked is passed in the EntryPoint property of the plugin's Context.
- Use the Run in background setting to display incoming call notifications to users, leveraging the displayNotification and dismissNotification Plugin SDK functions.
- Adding an app channel feature to an app in Front involves specifying a webhook URL where your channel will listen for Front updates. You then specify this value in the configuration section of the tutorial as the
callbackHostname. - Install NodeJS to run the code in this project.
Source code
You can view the source code for this project on GitHub.
You must make changes to the template code to make it production readyThe code is written with the goal of demonstrating how to implement a channel in Front in as simple a way as possible. As such, it is not meant as production-grade code, and should not be used as such. It is only a starter project.
- In order to minimize complexity and maximize the educational value of the project, important security and authentication steps have been simplified.
- The full logic for handling channel messages outside of Front has also been omitted.
- When implementing a channel for a real world use case, you should expand upon the basic framework provided in this tutorial to ensure your code meets security standards, handles a wide range of error scenarios, and includes message handling logic specific to the channel you are implementing.
However, aside from these specific areas, the project provides a strong base for developing channel integrations with Front, and can be used to streamline your development.
The project uses JavaScript as its programming language, and specifically makes use of the following frameworks:
You do not need to be an expert in these frameworks to make use of this tutorial. The tutorial will explain the key components of the project architecture. With an understanding of the architecture in this project, you can adapt the code to the programming language of your choice.
Step 1: Set up the project
In this step, you clone the project from GitHub and install the project dependencies.
- Clone the voice-channel-template repo available on GitHub.
- In your terminal, change directories into the voice-channel-template directory that you cloned.
- Run
npm install --global yarnto install the Yarn package manager. - Run
yarn installto install the project dependencies.
Step 2: Configure the server file
The src/server.ts file configures the Front channel credentials and establishes a server to handle channel requests.
- Open src/server.ts for editing.
- Replace the
frontIDandfrontSecretvalues with the App UID and App secret you obtained from the Settings tab for your app.
Use a secure method for retrieving channel credentialsIn a production scenario, obtain the channel configuration values from a secure environment file or variable outside of the server.ts file. This tutorial hard codes the values into the file for the sake of simplicity, but this is not a safe practice for your production Front channel implementation.
export const frontId = 'yourFrontId';
export const frontSecret = 'shhhhhhhhh';- Replace the
callbackHostnamevalue with the webhook URL where your server will run. For purposes of development, you can set up a local server using a tool like ngrok. When you are ready to deploy your channel to production, you can replace the development URL with your production URL. If you need to, adjust the default server port to the one you are using.
export const callbackHostname = 'https://your-ngrok-hostnmae.ngrok.io';
export const serverPort = '3000';- Save the file.
- Familiarize yourself with the rest of the code in the src/server.ts file.
- The code exports a randomString function for use in other parts of the project.
Update the randomString function for production purposesThis tutorial uses random strings to generate webhook IDs, message and conversation identifiers, and access tokens. In a production implementation, replace the
randomStringfunction with functions that generate these values securely and in a way that is appropriate for the channel you are integrating with.
- The code uses ExpressJS to set up middleware for processing requests and responses on the webhook server.
- The middleware parses URL-encoded JSON requests, including rich objects and arrays, so that the request values are accessible through JavaScript.
- The middleware routes requests using the routing logic configured in the src/routes.ts file.
export function randomString(length: number): string {
  return randomBytes(Math.floor(length / 2)).toString('hex');
}

const app = express();

app.use(bodyParser.json());
app.use(bodyParser.urlencoded({ extended: true }));
app.use(ChannelRouter);

app.listen(serverPort, () => {
  console.log(`Express server listening on port ${serverPort}`);
});
Step 3: Run the channel code
Now that you have configured the channel settings in the project, you can run the code.
- Open a terminal window.
- Run your webhook server. During development, you can use a tool like ngrok to run a local server that listens for events on port 3000 (or the port of your choice) by running
ngrok http 3000. For the production version of your channel, ensure the webhook server is hosted on a public URL. - Ensure the callbackHostname value in the server.ts file matches the URL of the webhook server.
- Open a second terminal window.
- In the voice-channel-template directory, run
yarn startto run the project code.
With these two terminals running, your channel integration will be able to listen to requests from Front on the configured port and route the requests appropriately to different sections of application logic.
Step 4: Add your channel in Front
With your code running, you are ready to add your channel in Front. Configuring your channel in Front adds an inbox (similar to an email inbox) in Front that is connected to an instance of your channel. Note that this steps depends on creating an app with an app channel feature as described in the Prerequisites section.
During development, you will be able to add your channel to the Front instance in which you created your app. After your integration is complete, Front can make it available to all Front customers if you so choose.
- In Front, click Settings > Me > Inboxes.
- Click Add an individual inbox to set up a new inbox.
- Follow the prompts to set up the inbox. In the Channels section, select your channel from the available options. The channel name and description should match what you specified in the app that contains your app channel feature.
- Supply the required authentication for your channel.
Ensure the server is runningDuring this step, Front sends an authorization request to your channel. If the request fails or your server is not running to receive it, then setting up the channel will fail. Refer to the Instantiating a new channel section to learn about the code that handles the initial authorization request.
- Finish configuring the inbox.
- Return to your main workspace view in Front.
- Click the new inbox that you just set up. This inbox is connected to an instance of your channel.
When you send outbound messages through this inbox, or import messages into it, Front sends updates to the webhook specified by your channel code so that your integration can process them. You can also use the voice call endpoints in the Channel API to process call events in Front. Continue reading the rest of the tutorial to learn how the channel template code works in detail.
Note the action items in this tutorialMake sure to note the Action items in the following sections of this tutorial. These items describe how to modify the code for use in a production channel integration.
Step 5: Familiarize yourself with the routes file to learn the application logic
The src/routes.ts file controls how requests from Front to your channel are processed. The file uses the routing functionality of ExpressJS to control how your channel integration responds to requests sent from Front.
Handling the OAuth flow
Front recommends that application channels implement OAuth 2.0 to authorize channel users. When a Front user connects to a channel configured with OAuth, Front sends authorization requests to your channel.
These routes handle the OAuth requests by:
- Redirecting the user to the specified OAuth redirect URI after successful authentication.
- Providing an authorization code in the redirect URI for use in requesting an access token.
- Providing an access token and refresh token when requested by Front.
- Handling token introspection for channel identification. The steps for token introspection are slightly different depending on whether your channel uses private or shared credentials.
Action itemFor the sake of simplicity, the tutorial code does not implement a real OAuth flow. Instead, it supplies random strings for the OAuth code and tokens. To complete your channel integration, add the logic for connecting with your authorization server within these routes.
Front API tokens are an alternative to OAuthFront recommends that your application channel implement OAuth for the convenience of the end user, but you can also use the API token authentication method and omit these OAuth routes. To learn more about the available authentication methods for application channels, refer to the Fundamentals of Application Channels topic.
Instantiating a new channel
When a Front user connects your channel to an inbox, Front posts an authorization request to your channel.
This route handles the request by:
- Checking to see if Front is requesting a list of shared credentials via a
list_addressestype of event. If so, the route returns a list of addresses as the user paginates through in Front. If the channel is configured to use private credentials, this portion is skipped. Learn more about private vs shared credentials here. - Checking that it is an authorization request. If it isn’t, an error is sent to Front (note that the value of the
messagefield in the error response is exposed to the Front user). - Responding with status code
200andtype:'success' - Responding with a unique URL
webhook_urlfor the channel to make requests to.
Action itemIn the tutorial code, the URL generates a webhook ID based on a random string. In your channel implementation, implement the appropriate logic for supplying a unique webhook identifier from the external system. Front saves the webhook ID for each instance of your channel that a user connects in Front. Subsequent requests for the channel instance are sent to the same webhook URL, which can be useful for organizing requests in your external system.
- Retrieving the
channel_idproperty.
Action itemWhen Front sends the authorization request, it also includes a
channel_idproperty. This value is different from the Front ID and secret credentials supplied for your channel from the Settings tab. You need thechannel_idif you want to update the call status or perform other actions related to the call Front, like adding a call summary. To sync perform these actions, your integration will need to call the Channel API, which requires thechannel_idto identify which channel in Front to update. The tutorial code does not demonstrate how to retrieve and store the state of thechannel_id, so this is something that you must add in a production channel integration if you wish to sync external messages from the channel into Front.
Deleting an instance of a channel
When a Front user deletes an instance of your channel from an inbox, Front sends your channel integration a delete request.
This route handles the request by:
- Checking that the request is a DELETE type. If it isn’t, an error is sent to Front (note that the value of the
messagefield in the error response is exposed to the Front user). - Responding with a status code of
200if the request is received successfully.
Action itemThe tutorial code provides a response to the deletion request, but does not supply any logic for handling the request in the external system. Add the missing logic in your channel integration so that the event representing a user removing the channel from their Front inbox is appropriately reflected in the external system. This could involve triggering notifications about the disconnection or initiating downstream tasks in the external channel system.
Verifying that requests are coming from Front
For security purposes, your channel integration should verify that all requests made to your webhook server are coming from Front. The tutorial code executes the verifyFrontRequest method for all routes in the application. This method contains the following logic to verify that the requests are authentic:
- Extracts the timestamp supplied in the request header.
- Creates a SHA-256 signature based on the timestamp, request body, and the secret associated with your channel.
Use a secure method for retrieving channel credentialsIn a production implementation, you should obtain the secret value from an environment file rather than hard coding it into the src/server.ts file as shown in the tutorial.
- Checks to see whether the signature generated matches the
x-front-signaturesupplied in the header. If the signatures do not match, your integration should return a400response error and assume the request is not coming from Front.
The following partial code snippet displays the function logic. Refer to the full file for necessary imports.
function verifyFrontRequest(req: Request, res: Response, next: NextFunction) {
  const timestamp = req.headers['x-front-request-timestamp'];
  const rawBody = JSON.stringify(req.body);
  const baseString = `${timestamp}:${rawBody}`;

  const hmac = createHmac('sha256', frontSecret)
    .update(baseString)
    .digest('base64');

  if (hmac !== req.headers['x-front-signature']) {
    return res.send(400).json({ type: 'bad_request', message: 'Signature not verified' });
  }

  next();
}
Step 6: Familiarize yourself with the Front Channel API connector file to process call events in Front
The src/front_connector.ts file syncs call events such as hangups, transfers, etc. so they are properly handled in Front. It also provides methods for adding call summaries, transcripts, recordings, and other related assets to the conversation.
This methods in the file use the Channel API to accomplish these actions, specifically the voice channel endpoints. Using these methods, your channel integration can update Front to remain in sync with call events occurring in the external call service.
Call the methods in this file or use Postman to test the Channel API endpointsThe tutorial code does not call the methods defined in this file. You can modify the code to do so, or use an API testing client like Postman to call the API directly for testing purposes. Whether you call the methods in the code or make the API requests through a testing client, you will see updates appear in the Front inbox in which you connected the instance of your application channel. You can use our Channel API Postman collection to facilitate your testing for this section of the channel integration.
Channel ID
When Front sends the initial authorization request for your channel, it also includes a channel_id property. This value is different from the Front ID and secret credentials supplied for your channel. You need the channel_id to make calls to the Channel API, which allows you to perform action like updating call status or adding call assets to the conversation.
Action itemRefer to the Instantiating a new channel section to learn how to retrieve the
channel_idvalue. Store this value and make it accessible within the front_connector.ts file. This value allows your integration to call the Channel API endpoints.
TypeScript Interfaces for the Channel API requests
The front_connector.ts file defines TypeScript interfaces for the Channel API call objects.
Create a new call
This method creates a new call in Front using the Create a call endpoint. The external_call_id uniquely identifies the call in the provider system. If you want to thread a new call into an existing Front conversation (for example, when a call is transferred—thus ending the existing call and beginning a new one), you do so by setting the parent_external_call_id to the external identifier of the original call. Otherwise, the external_call_id and parent_external_call_id should match.
The method uses the API request helper functions to assemble the endpoint URL and headers as appropriate, depending on what type of API call is needed and whether the payload includes attachments.
Action itemAdd logic for calling this method whenever a new voice call should synced from your channel to Front.
Update call status
This method updates an existing call using the Update call status endpoint. Descriptions of the different call statuses can be found in the voice channels topic.
The method uses the API request helper functions to assemble the endpoint URL and headers as appropriate, depending on what type of API call is needed and whether the payload includes attachments.
Action itemAdd logic for calling this method whenever a call's status should be updated, such as when a call is transferred, put on hold, terminated, etc.
Update call assets
These methods add call assets such as recordings, transcripts, and summaries to the Front conversation using endpoints like Add call summary, Add call transcript, and Add call recording.
These methods use the API request helper functions to assemble the endpoint URL and headers as appropriate, depending on what type of API call is needed and whether the payload includes attachments.
Action itemAdd logic for calling these methods whenever you need to add assets like transcripts, recordings, or summaries to a conversation.
Build the JSON web token
The buildToken method creates a JSON web token that is used for authenticating the Channel API requests. The token is sent in a header as Authorization: Bearer <token value>. This method contains the following logic:
- Establishes a Unix timestamp ten seconds from the current moment. The additional ten seconds are added to set an expiration for the token within that window of time. This extra security measure prevents a token from being reused beyond the initial ten second window, even if it is successfully intercepted by an attacker.
- Creates a JWT payload with the channel ID, Front ID, and a random string.
Use a secure method for retrieving channel credentialsIn a production implementation of a application channel, these values should be securely retrieved from an environment file rather than hard coded into the server.ts file.
- Signs the token with the Front secret. Note that in a production implementation of a channel, this value should be securely retrieved from an environment file rather than hard coded into the server.ts file.
static buildToken(channelId: string) {
    const signature = frontSecret;
    const exp = moment.utc(Date.now()).add('10', 'seconds').unix();
    const payload = {
      iss: frontId,
      jti: randomString(8),
      sub: channelId,
      exp
    };


    return jwt.sign(payload, signature);
  }
Step 7: Add a plugin to handle call notifications
When an incoming call occurs, you should notify Front teammates by using a Front sidebar plugin that leverages the displayNotification and dismissNotification SDK methods. The plugin runs in the background and emits notifications when necessary, and can also close the notifications without teammate interaction when the call is accepted. You can leverage the sidebar plugin for additional call interactivity features if you'd like, but as a minimum the notification system will start you off with the basics of what's needed for a Front teammate to accept incoming calls.
Make sure to set up a plugin feature in your developer app as described in the Prerequisites section.
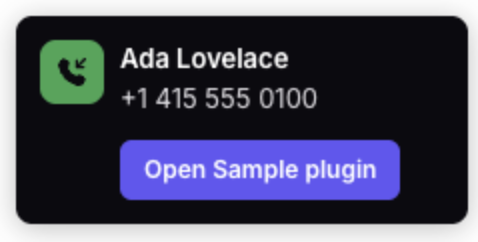
The following screenshot displays a call notification. The button is titled "Open YOUR_APP_NAME" and triggers your sidebar plugin expanding when clicked. The button does not start the call; you should handle accepting calls within your plugin (more information below).
In the sample code, the src/plugin_routes.ts file and the src/public directory load your plugin as a simple React app.
Review src/public/app.tsx , to familiarize yourself with the fundamentals of displaying call notifications:
- This line limits notifications to sidebar plugins (when one, multiple, or no conversations are selected). It prevents notifications from displaying in other contexts, such as within a teammate's composer window, by excluding those Front context types.
- This wrapper defines the basic contract needed to display and dismiss notifications.
- This code provides a starting point for limiting notifications to a specific teammate. The basic idea is that you would identify the user who logged into your plugin (authorization code for the voice call system is omitted from the sample code) and match that with the Front teammate email address identified from the Front context object.
Action item
Add logic for identifying the user logged into the voice call system and matching that against the teammate email address provided in the Front context so that you only display the incoming call notifications to the appropriate user, if applicable.
- This code handles incoming call and call ended events, essentially calling the SDK methods to open and close the notifications.
- This code provides a starting point for rendering the call information you want to display in your sidebar plugin, separate from the notification. The notification displays a caller name and number, but does not provide teammates with the ability to interact with the call. Those controls should be built into your plugin. You can provide options for accepting calls, changing call state (hold, transfer, etc.), ending calls, making new outbound calls, etc.
Action item
Decide what additional information you want to display in the sidebar plugin. Plugins can render your entire webapp within Front, so you can add as much or as little information as you want.
As a minimum, your plugin should allow Front teammates to accept incoming calls. The idea is that the notification alerts teammates about incoming calls, allows them to open the plugin, and from there the plugin handles the full call state and workflow.
To learn more about Front plugins, refer to the Plugin section of our documentation, which includes a Getting Started tutorial with sample code, the full Plugin SDK Reference, a prompt file to build plugins easily with AI, and additional sample applications.
All done!
Congratulations! You just set up a code template for building voice channel integrations with Front. This template handles instantiating a new channel, authorizing Front users trying to connect with your channel, processing new voice calls, notifying Front teammates of the call, updating call status, and adding call assets back into Front.
You can use this template to build voice application channel integrations and make them available to all Front customers or just your own company.
Now that you are familiar with the basics of building voice application channels, refer to the following resources to complete your understanding and facilitate your development:
- Channel API reference
- Voice calls endpoints
- Fundamentals of Application Channels
- Voice channels general guide and call status descriptions
- Tools for developing application channel integrations
- FAQ about application channels
Updated 3 months ago